
T3 Syncro front differential
29 de noviembre de 2016
When I went to look at the T3 Syncro, the owner told me that the T3 Syncro’s front differential was broken. The driveshaft had been removed, so only the rear axle was driving the wheels. In other words, it wasn’t much of a Syncro at all – it was rear-wheel drive only (like the rest of the T3 range).
It was already clear to me at that point that this would be one of the first things I’d have to sort out. Restoring the 4×4 drive was essential and a top priority.
Table of contents
- T3 Syncro 4.57 front differential
- Procedure for removing the T3 Syncro front differential
- The surprise upon opening the T3 Syncro front differential
- Assessment of damage to the T3 Syncro front differential
It was time to do some research to find out what sort of front differential I had. I also asked a specialist garage, passing on the only note I had from the previous owner’s paperwork: AKH
With that information, the workshop told me it was a 4.57 differential – well, that gave me a bit more to go on. That’s when I remembered that I’d downloaded a table from somewhere containing all the details about the differentials.
T3 Syncro front and rear differential codes
Things were starting to become clearer:
- Front differential: AKH
- Rear differential: AKG
- Ratio: 32:7
- Nom: 4.57
- Fitted with engines: 64, 70 and 82 kW
Everything matched up – the sticker inside my T3 Syncro stated that the transmission code was AKG, and my engine is an 82 kW petrol unit. But there’s always a catch.
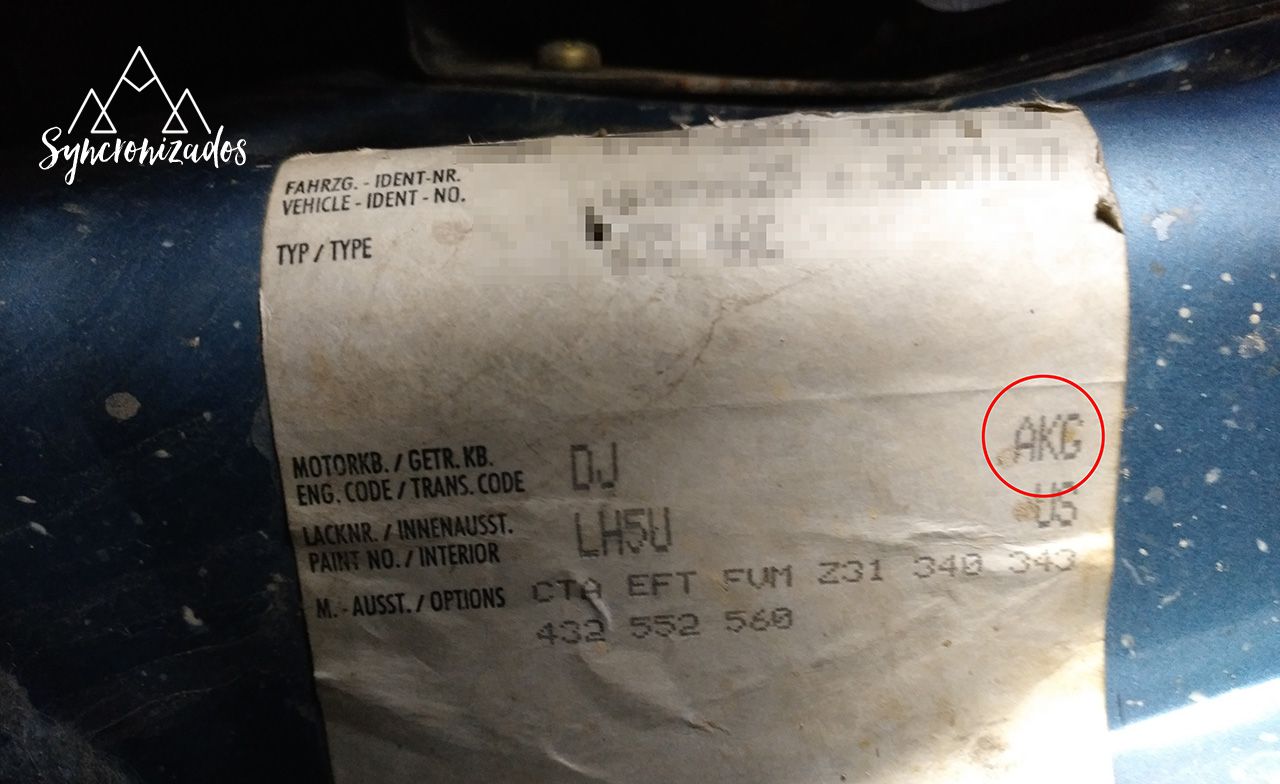
The bad news is that I was told that this T3 Syncro front differential was hard to find and that they’d already had to fit both the front and rear differentials to a 4.86 ratio on another van, which is more common. I say front and rear differentials because the gear ratios have to match. This is very important. Bottom line: I was worried.
But I wasn’t going to give up; I was going to do some more research to see what I could find out. And it paid off, as I found at least three places that stocked the 4.57 pinion and crown wheel I needed for my T3 Syncro front differential.
– Weddle
Industries – Bern Jaëger –
Notter Motorsports
Part number: VW 094409142F
T3 Syncro front differential 4.57
Of all the options, I decided to buy it from the US as the price was lower (around 595 euros including postage). I still needed to find out the cost of customs duties and VAT, as anything over 150 euros is subject to 2.5 per cent customs duty and 21 per cent VAT. We added 167 euros to that and it was delivered to my door.
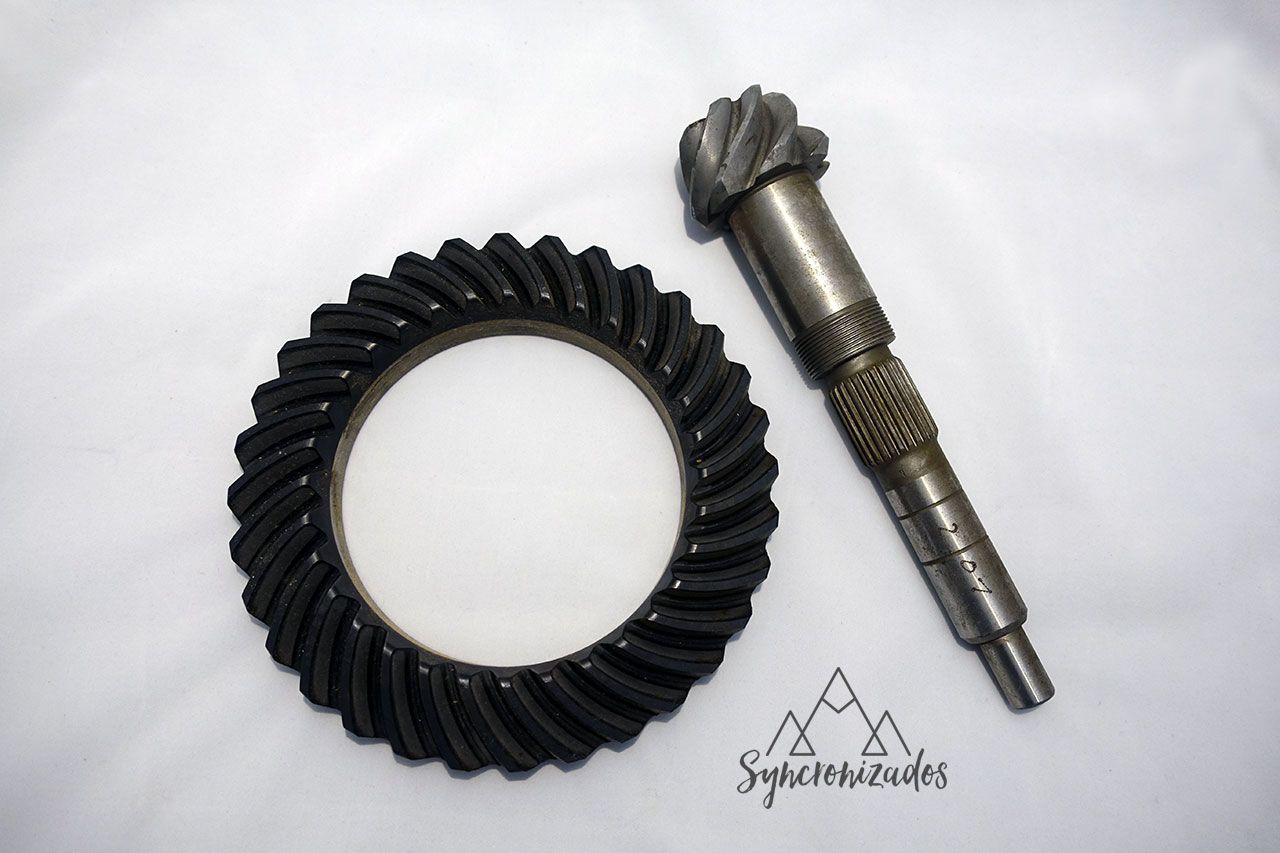
In the end, it works out more or less the same as buying it in Germany, but it was worth a try.
After buying the crown wheel and pinion, it was time to remove the front differential and check its condition.
I’m keen to find out what components it contains and what condition they’re in. The outlook isn’t good because the speedometer is loose and spins. This suggests that some parts may be missing. But anyway, we won’t know what we’re dealing with until we open it up.
Procedure for removing the T3 Syncro front differential
Removing the front differential is relatively straightforward.
To do this, you need to remove a few bolts and disconnect the constant-velocity joints. Ideally, you’d have a hoist to make the job easier. In my case, I removed it without using one. In fact, I didn’t even use a hydraulic jack to lift the van. It’s a tight fit, but it does come off.
The first step is to disconnect the constant-velocity joints on the differential side. For this, you’ll need an M8 XZN bit. As I didn’t have any, I decided to buy a set of bits.
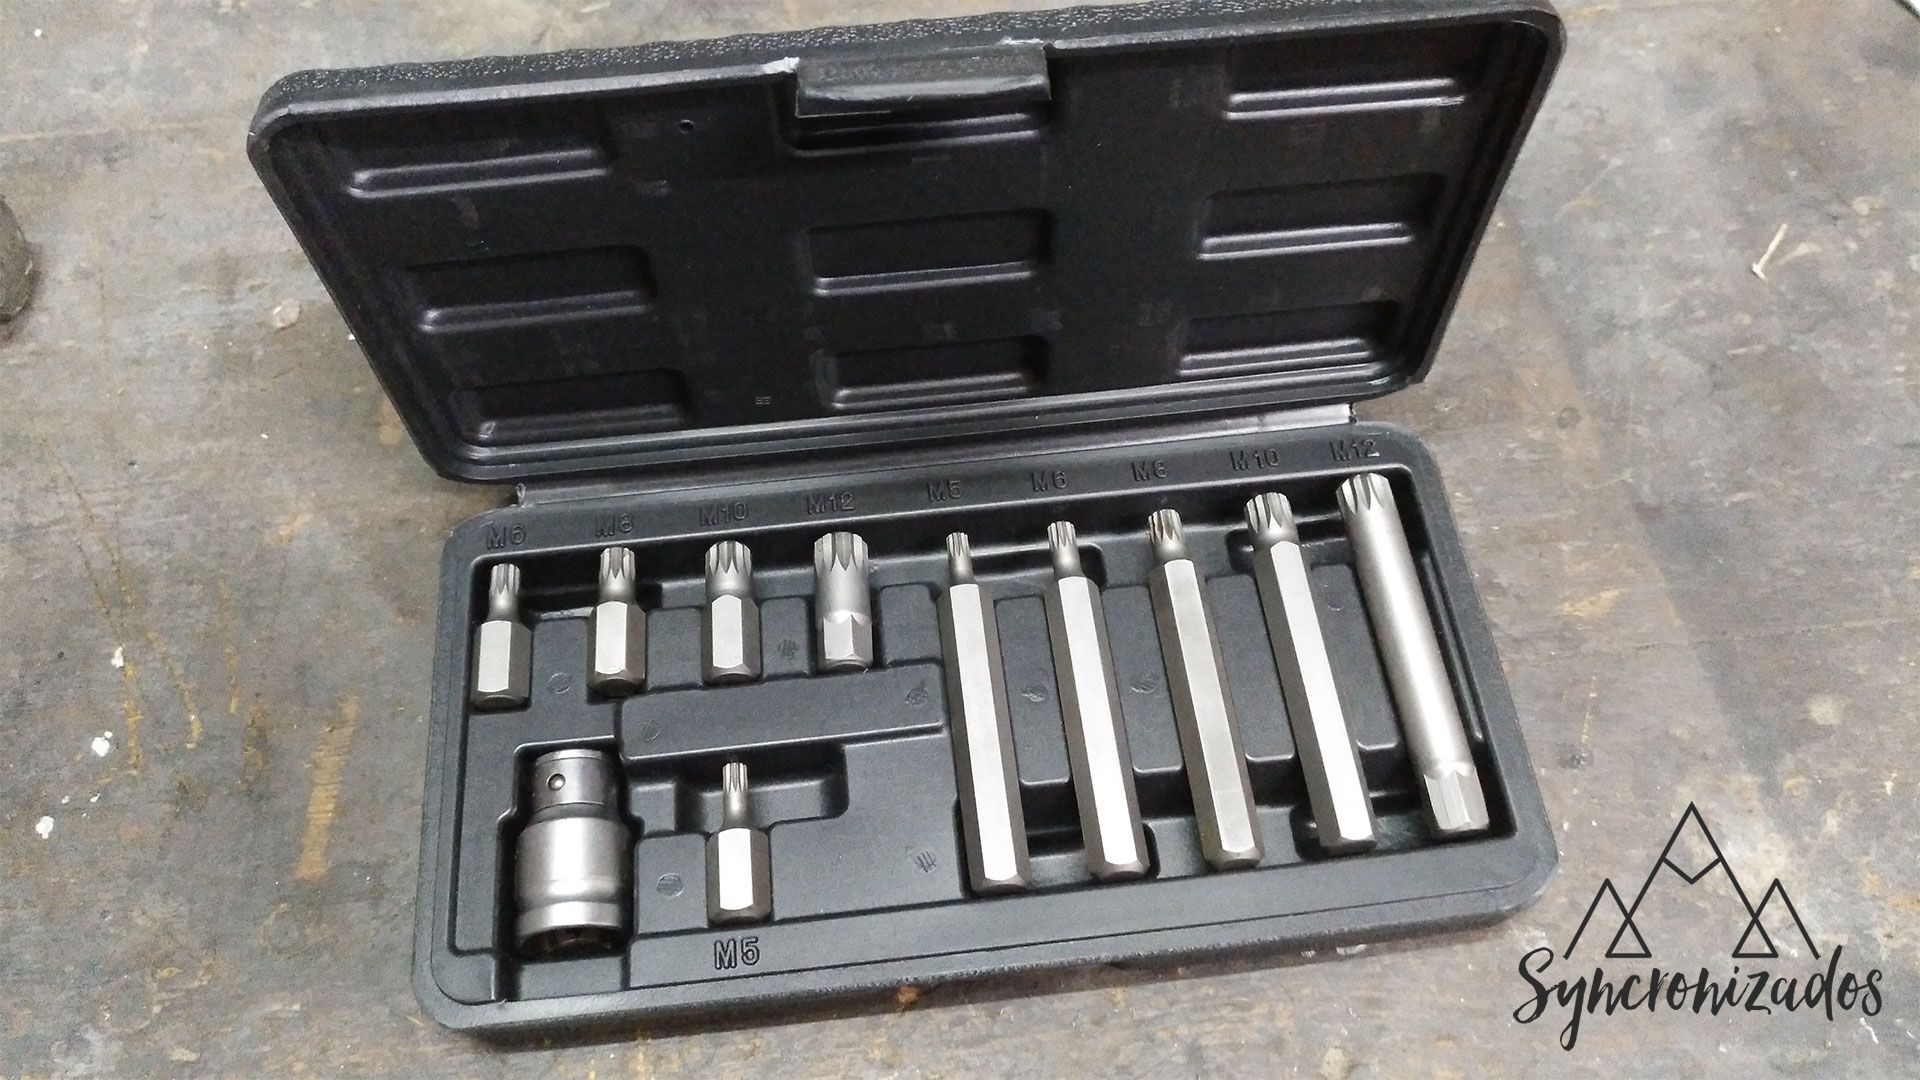
I bought them on Amazon:
Fit the bit onto the ratchet and start unscrewing. There are six bolts per CV joint. If you don’t run into any problems, in a short while you’ll have removed all twelve bolts and the front differential side half-shafts will drop out. Be careful they don’t hit the ground.
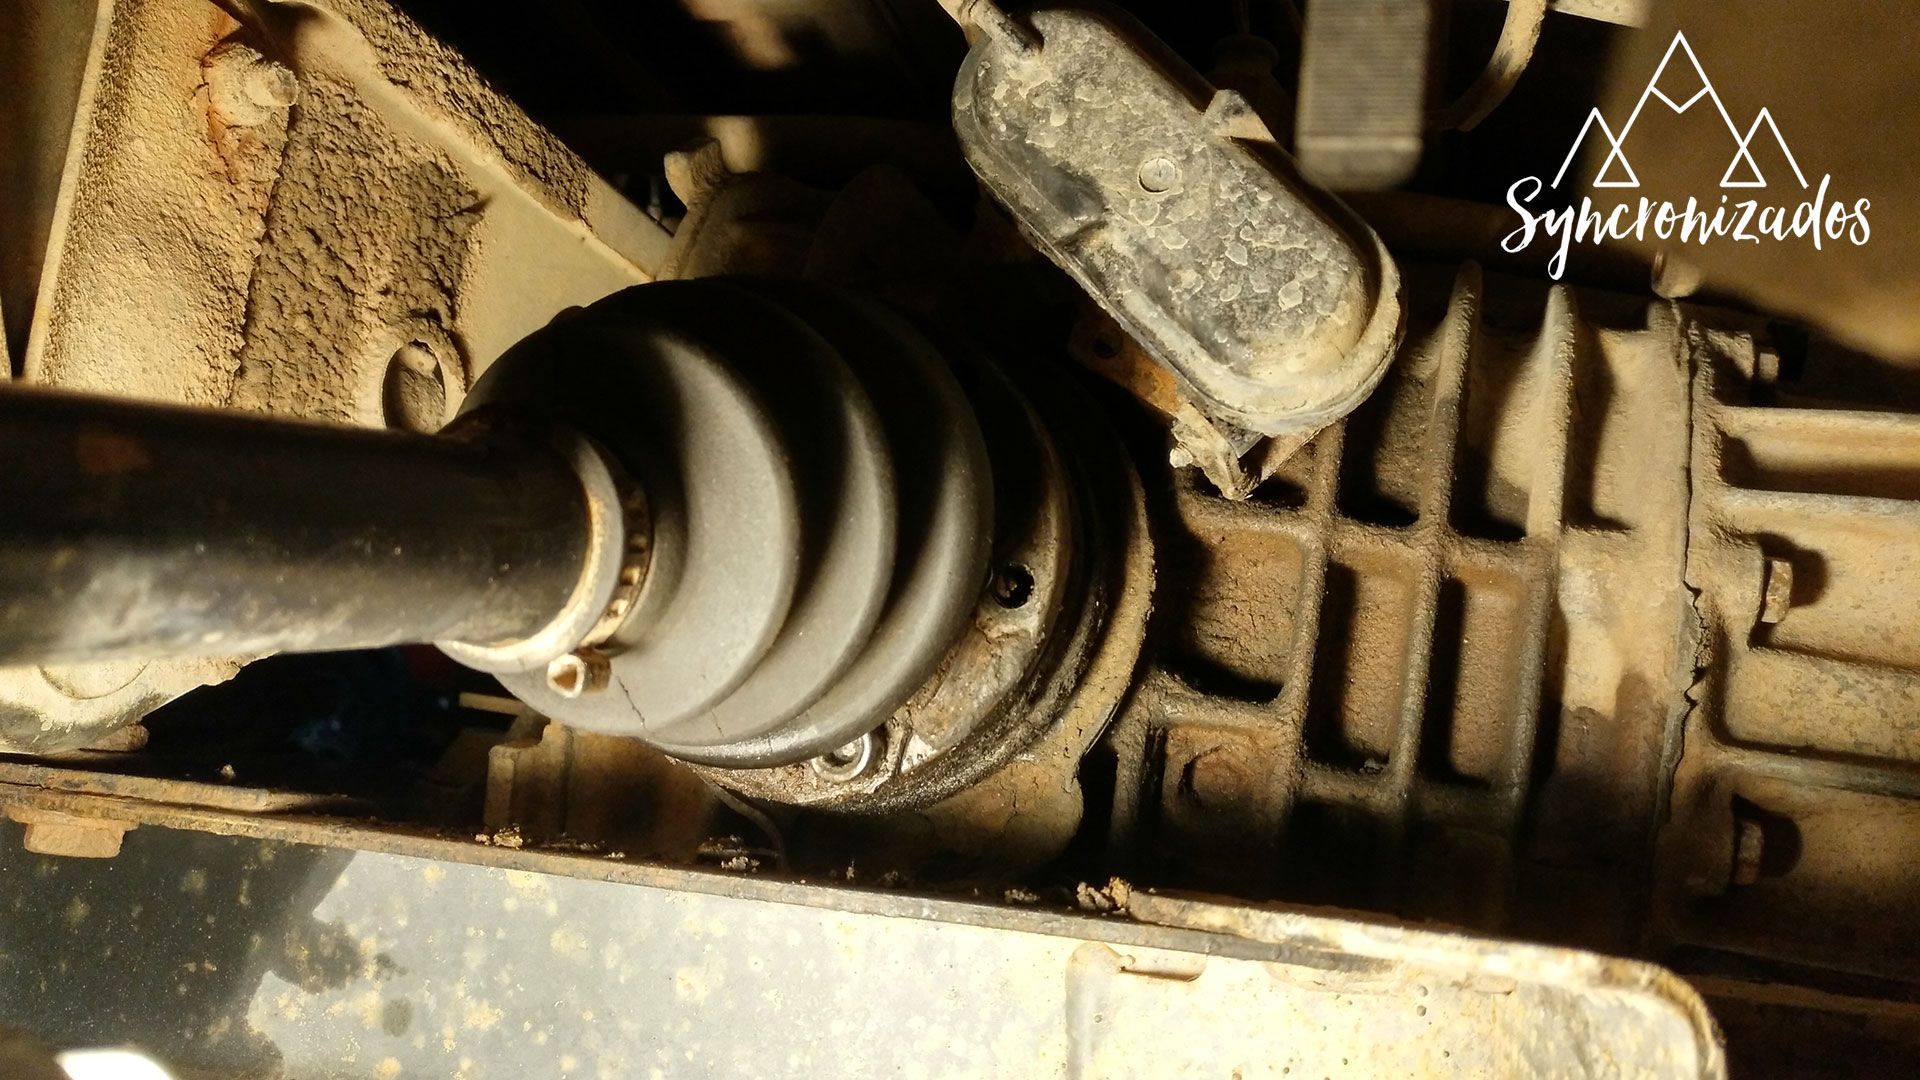
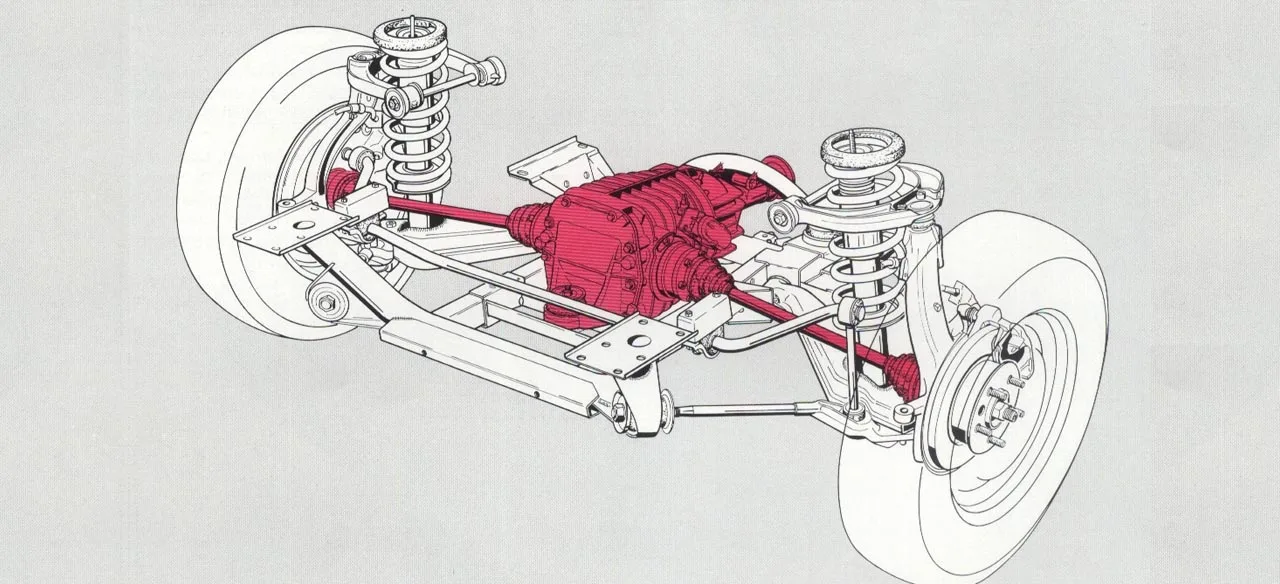
Next, start removing the bolts that hold them in place. There are two bolts at the rear and a cross-member (with two silent blocks) which you should also remove as this will free up some space. At the front, there’s a bolt with a silent block and a plate secured by two more bolts. You can see these in the diagram below.
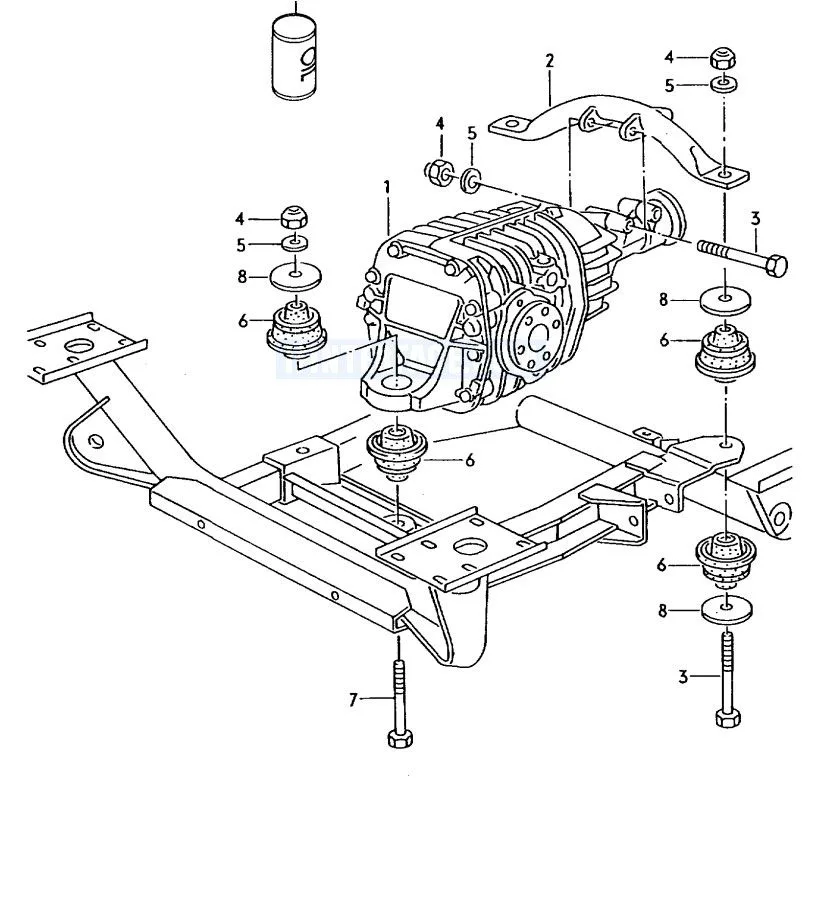
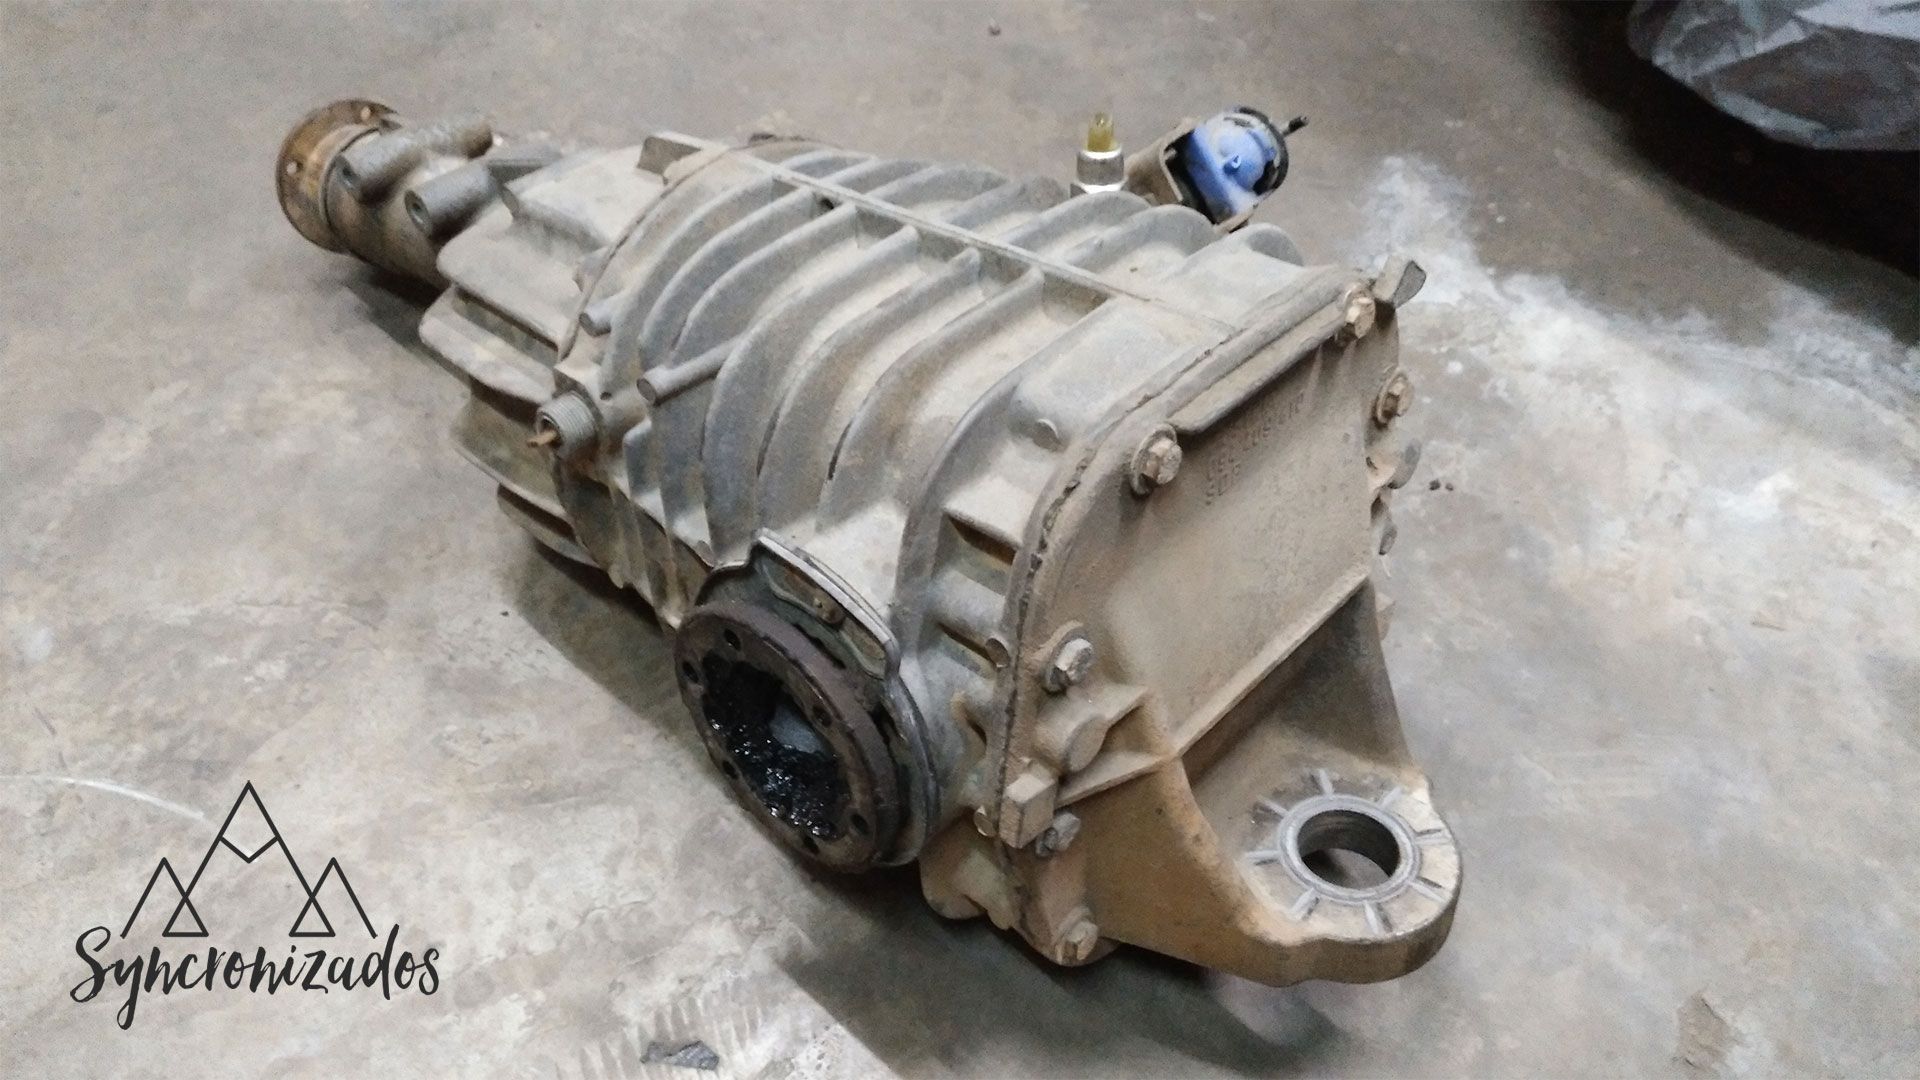
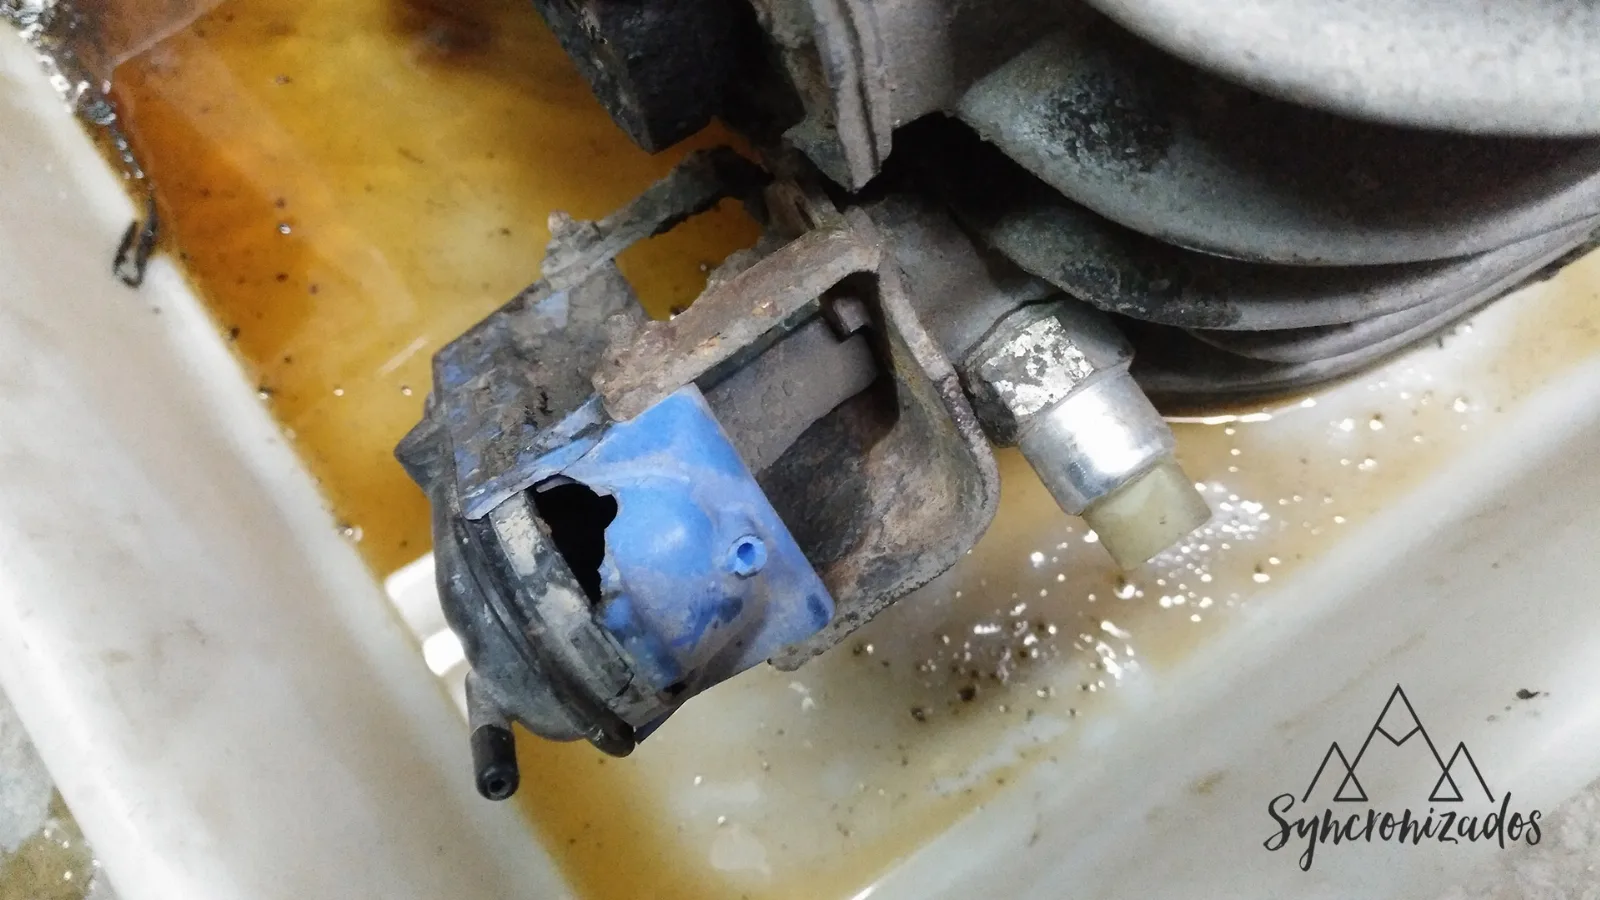
All that remains is to detach the breather and the speedometer (in my case, it was already disconnected). Now it’s a matter of moving the plates and manoeuvring it to lower it. Be careful with the locking actuator, as when you lower the differential, you might end up like me and break the plastic housing.
Here it is:
The surprise upon opening the T3 Syncro front differential
The differential hasn’t even touched the ground and I’m already keen to open it up. Fancy a look?
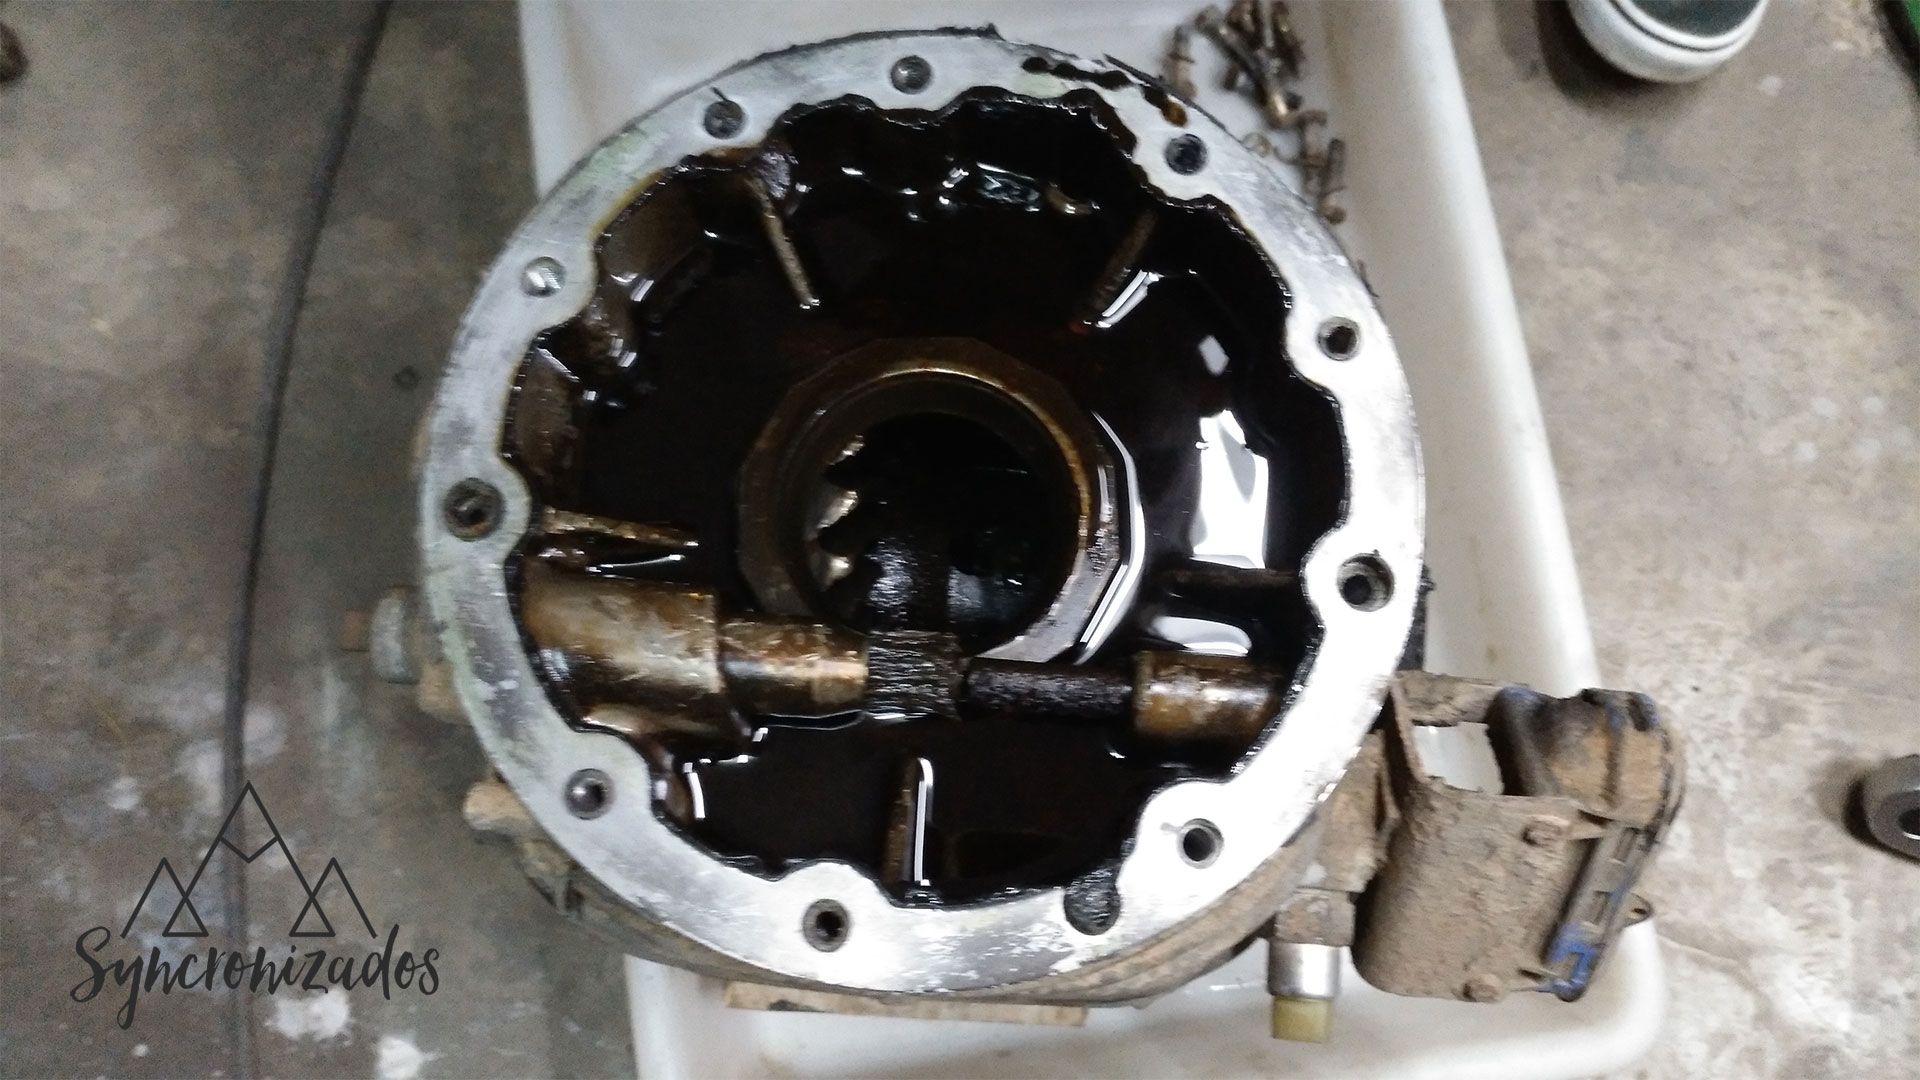
Very bad news – as well as the parts we suspected were missing, we’ve discovered a proper mess. The locking system is welded shut!! Yes, some ‘handyman’ has got out the soldering iron and gone to town with the welds. What a disaster!! As well as the missing parts, I’ve also found wear and tear on others, such as the rev counter pinion, which is literally smashed to bits.
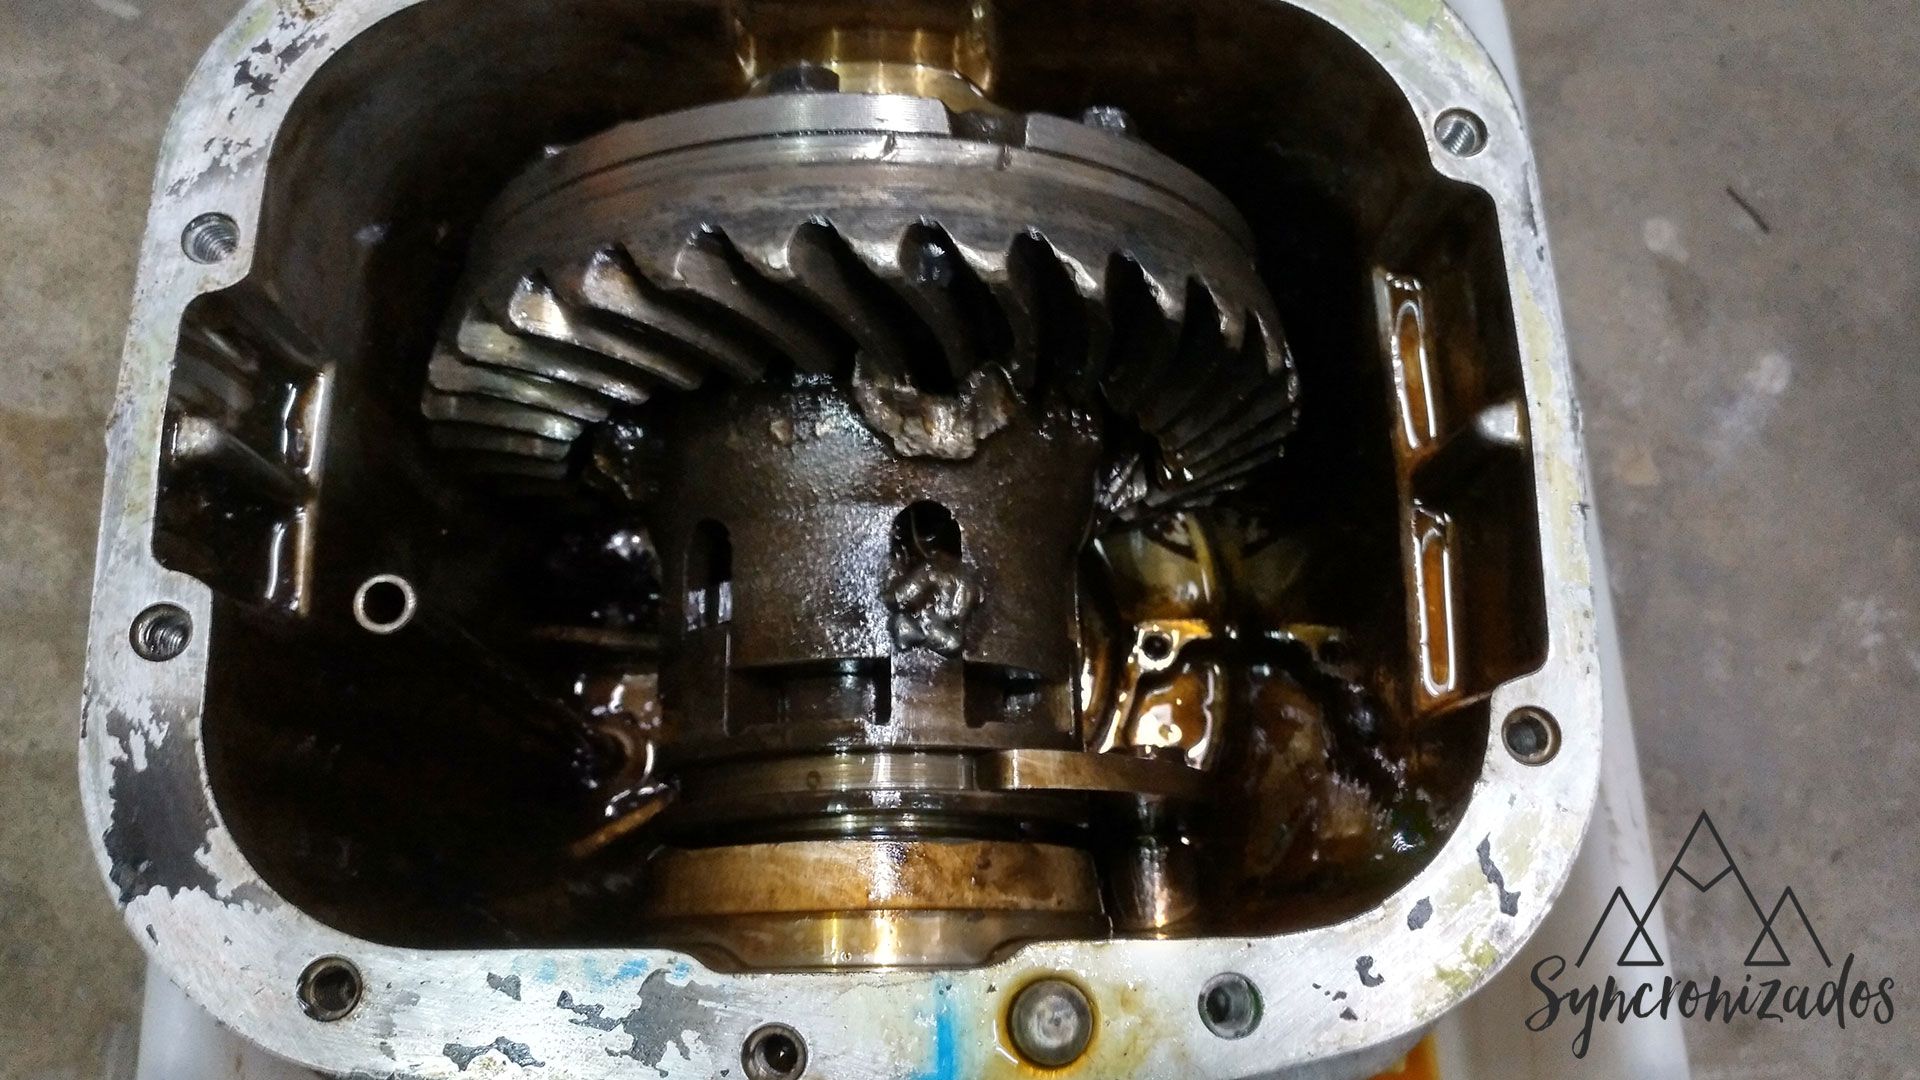
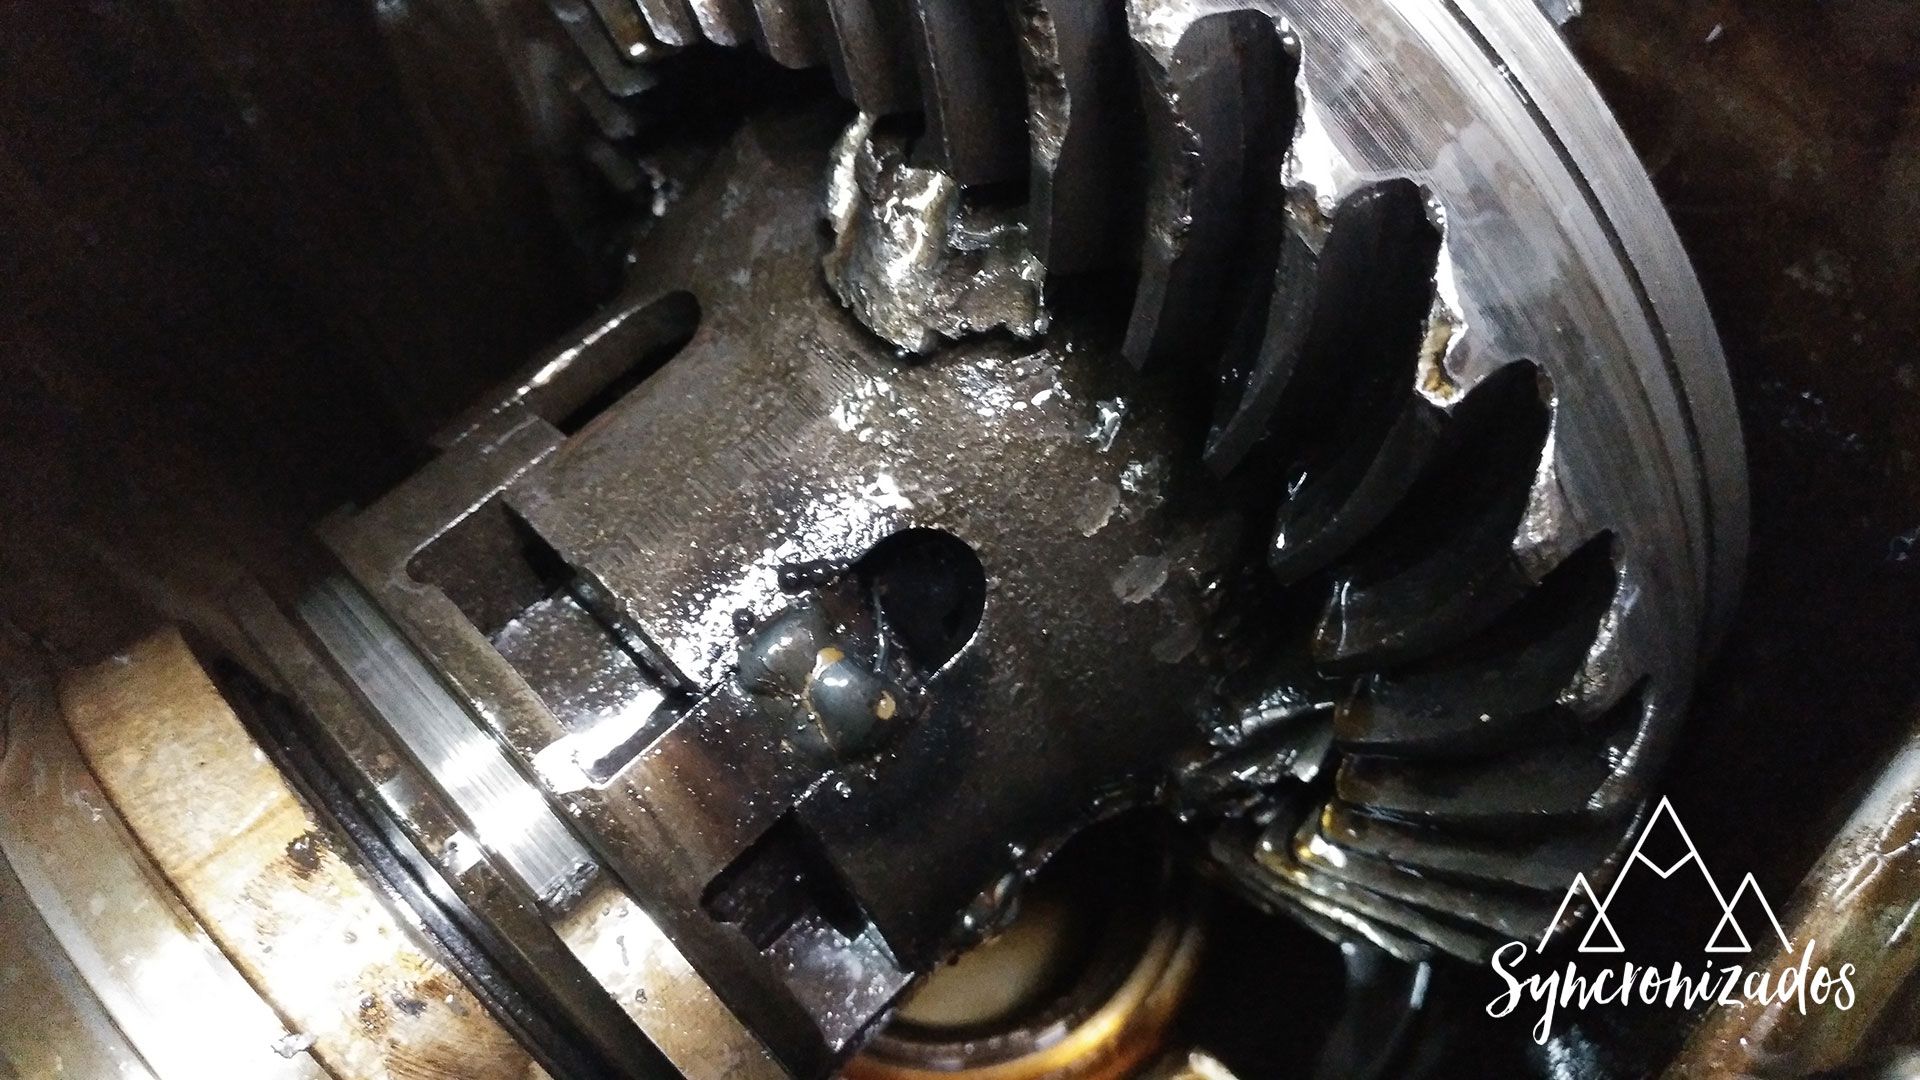
This prevents the actuator from engaging and moving. Here’s a video showing what it’s supposed to do.
And here’s a video where you can see the welds:
Time to assess the damage and see which parts I need to buy.
To do that, I’m checking the ETKA to locate all the parts I’m missing and find out their part numbers.
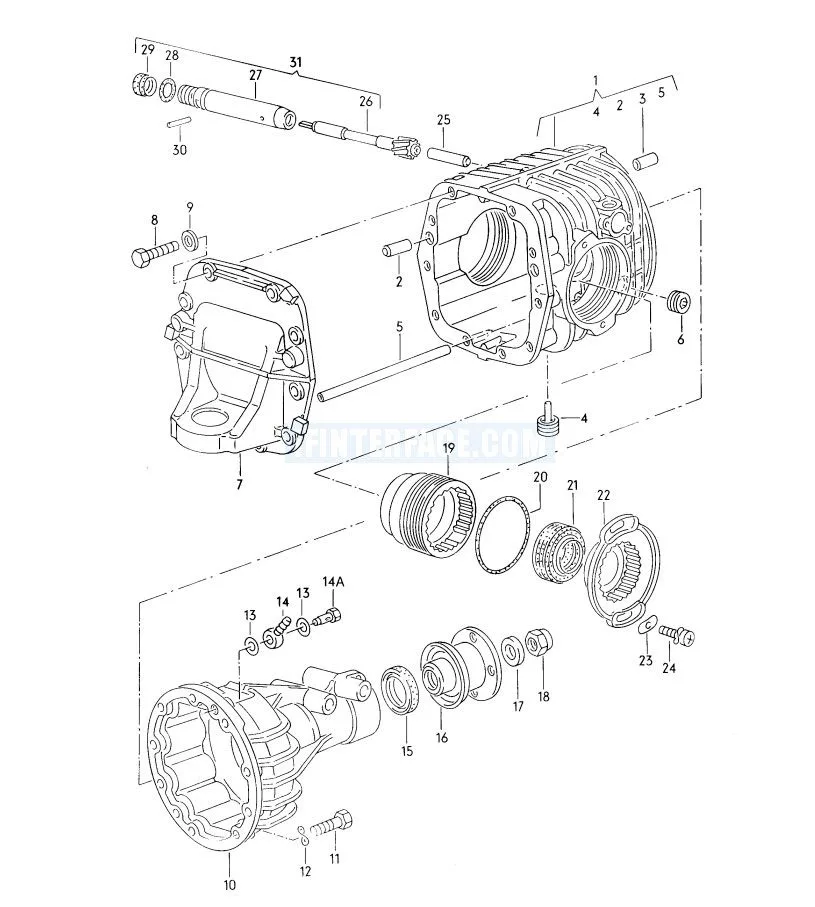
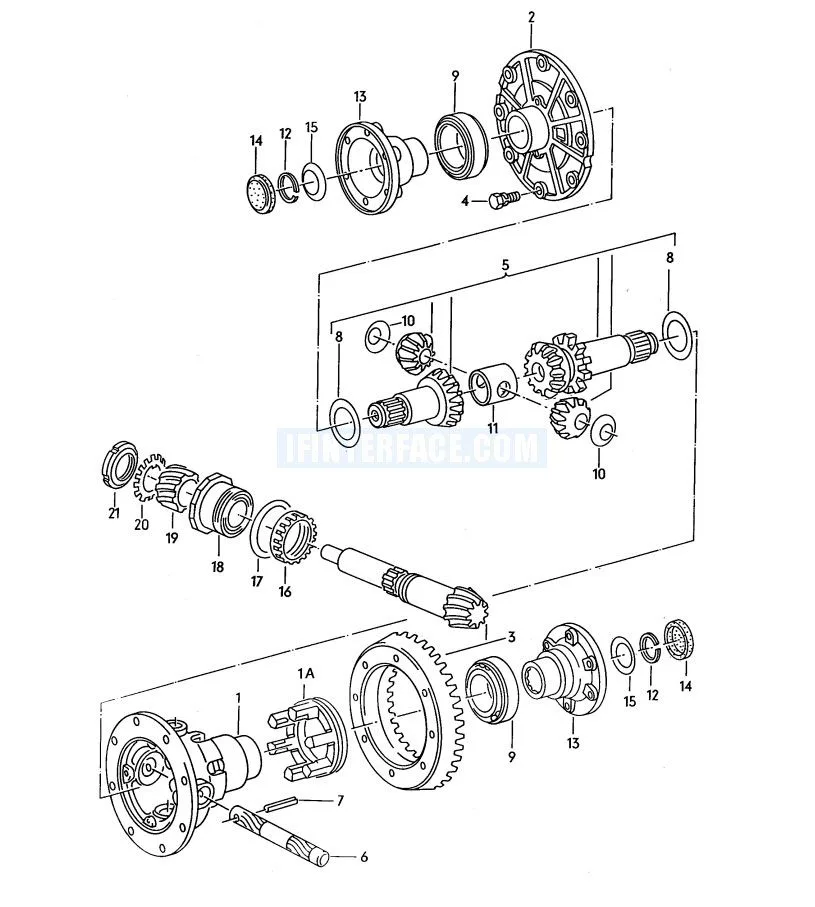
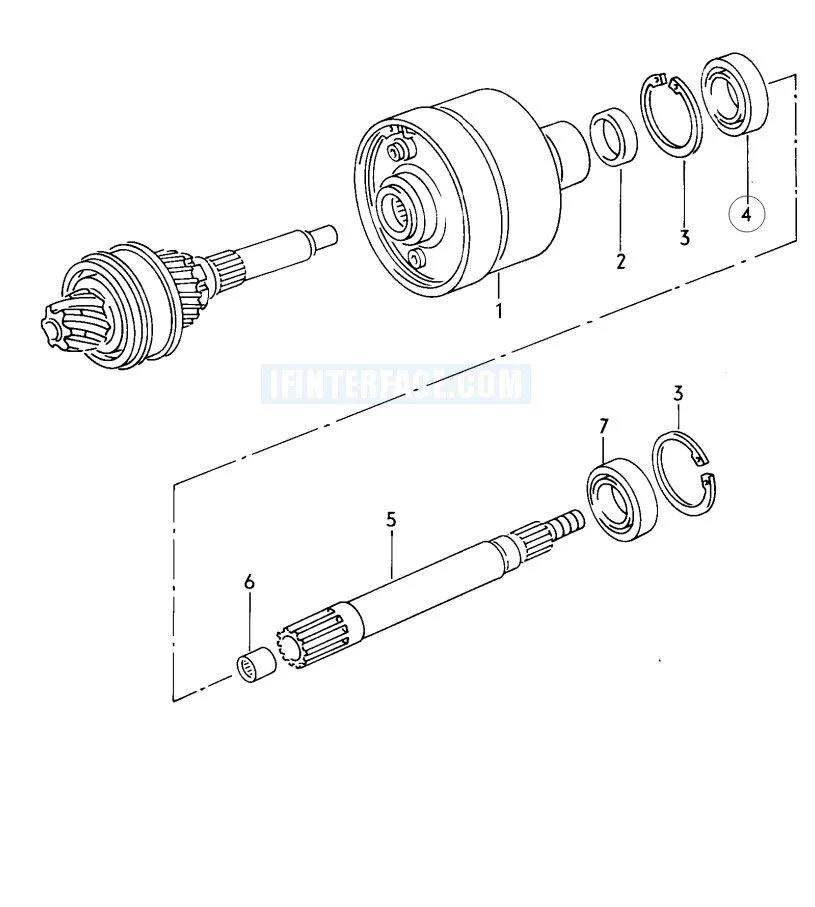
Damage assessment of the T3 Syncro front differential
After the pleasant surprise of opening up the T3 Syncro front differential, it’s time to carry on investigating to assess the damage to the front differential.
So I’m going to completely dismantle all the differential components and make a note of the damaged parts, as well as those I’ll replace due to wear and tear. Might as well do it all in one go…
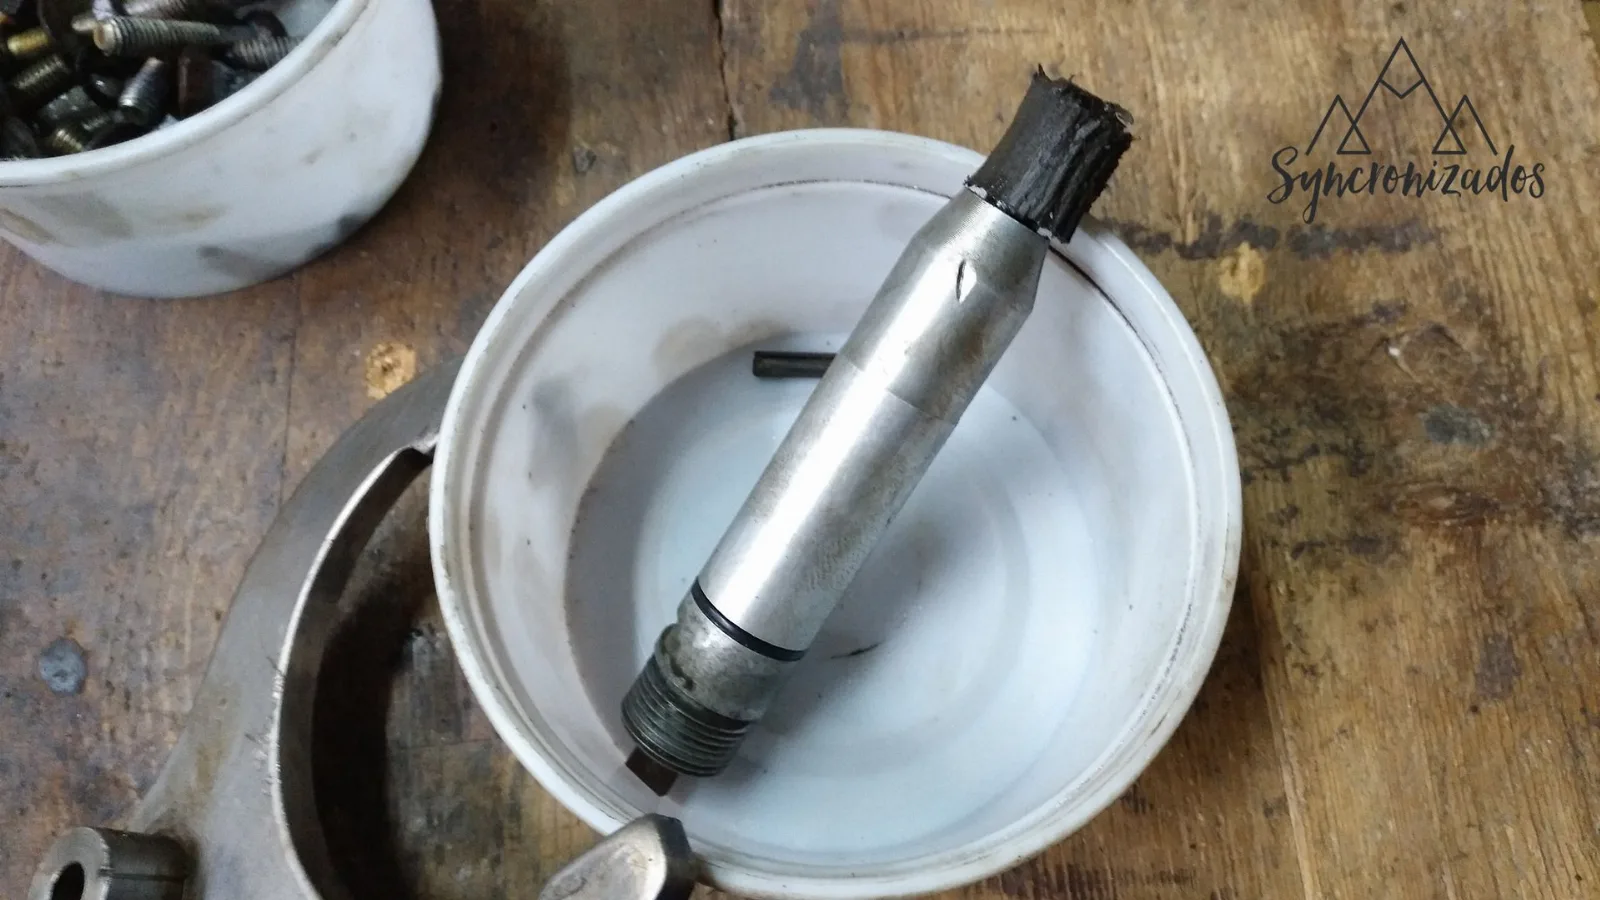
As I dismantle it, I can see it’s in a right state. As well as the welding on the locking mechanism and the pinion and crown wheel that I already knew needed replacing, I can see that the speedometer pinion is completely worn smooth.
We can also add the lock’s shock absorber to the list; when I lowered the differential, I knocked it and, as it’s made of plastic, it broke.
I carry on dismantling to remove all the parts, and the damage continues, as the part that’s fixed to the housing – which acts as a centring mechanism for the drive pinion – is also broken, presumably after the pinion snapped. The impact must have struck and snapped the part.
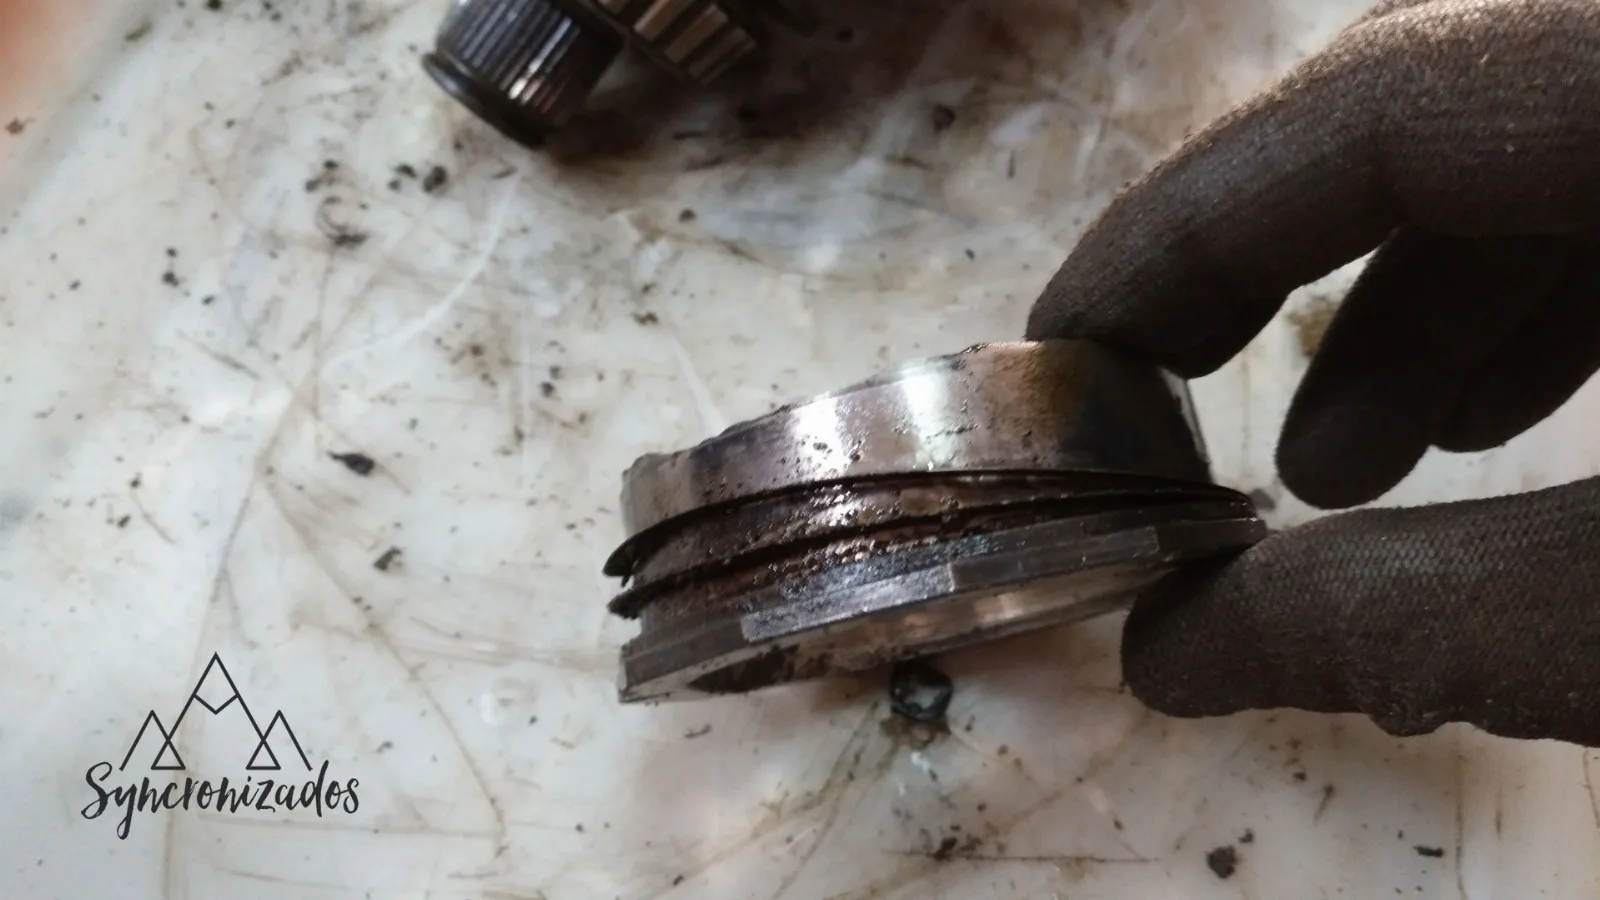
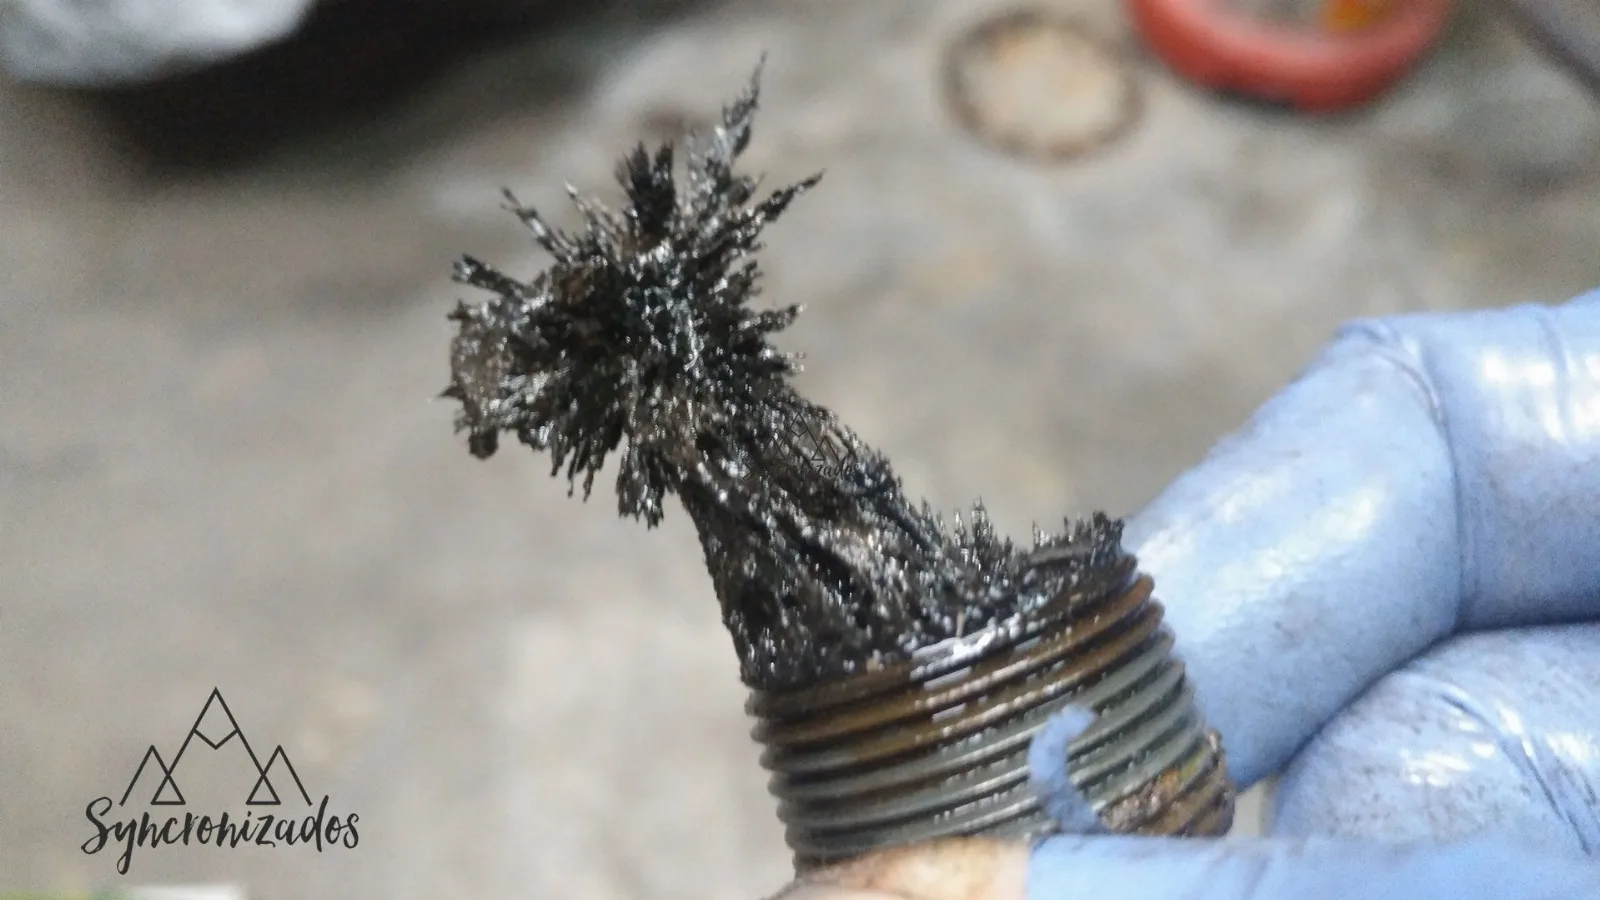
Look at the state of the magnetic plug:
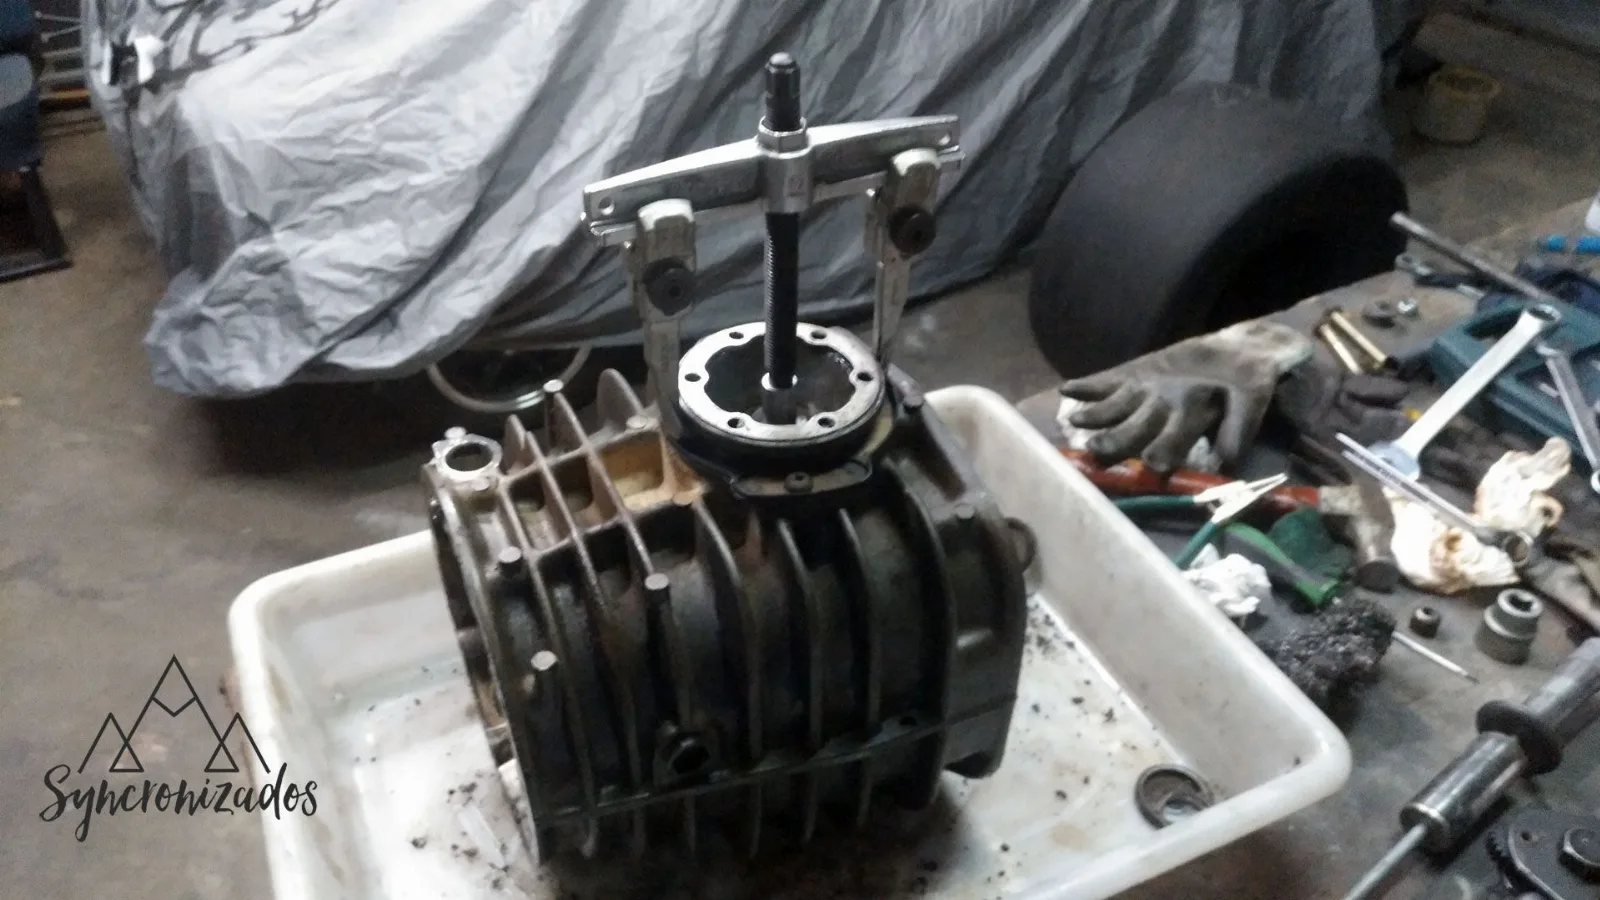
In fact, even the casing itself has marks from internal impacts sustained when it broke. Remember that the drive pinion snapped in half and must have been rattling about inside, hitting the walls until the van came to a halt.
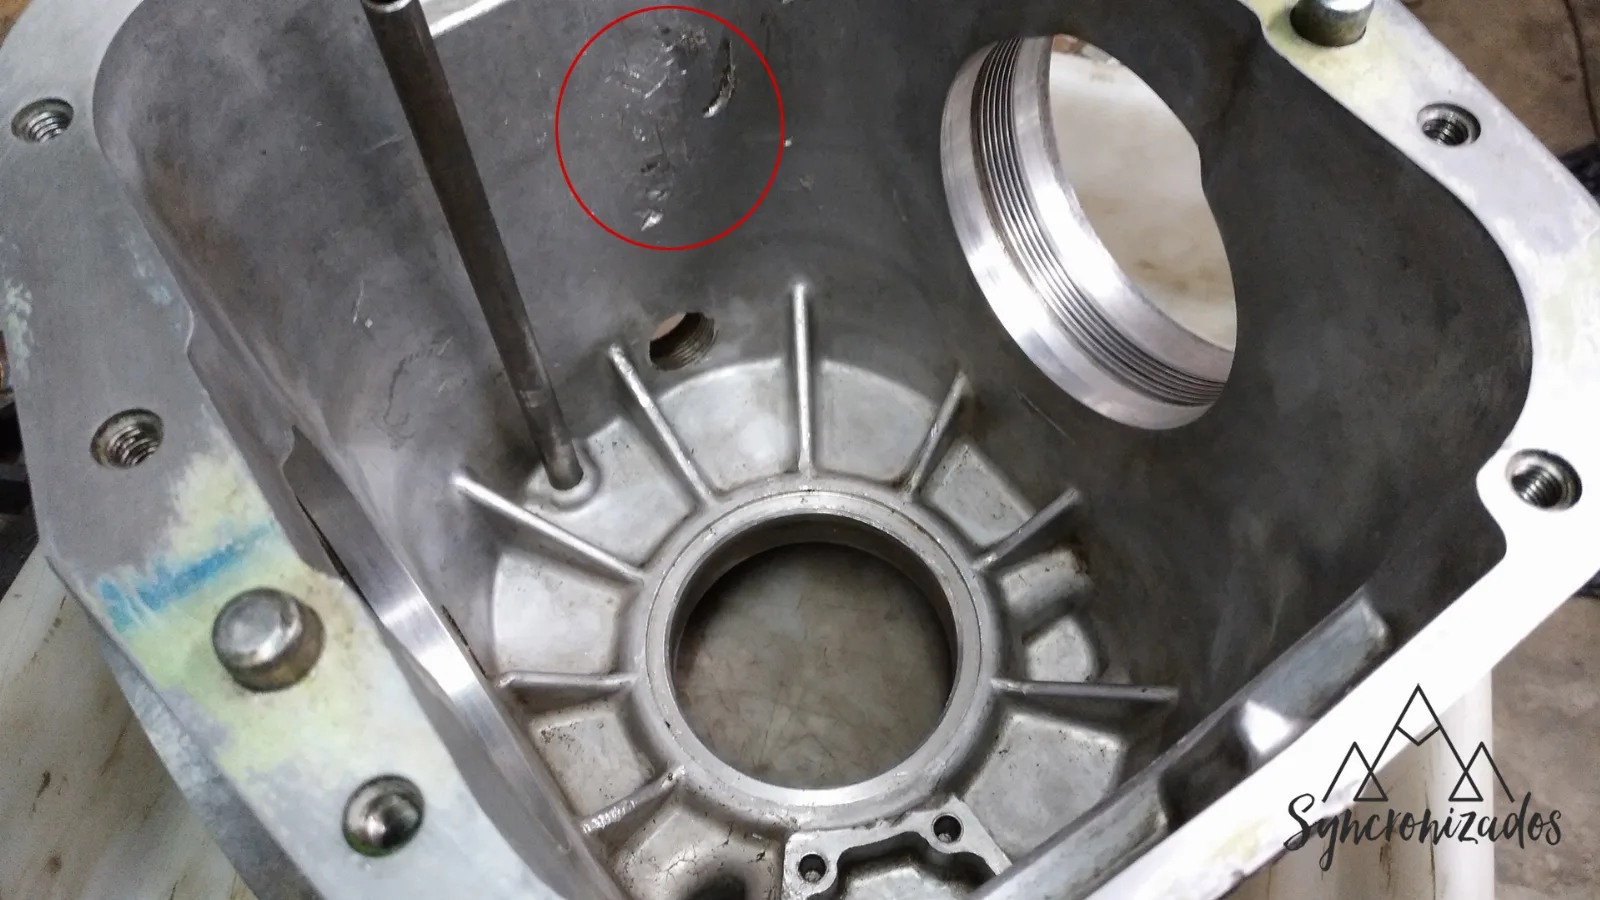
Fortunately, these marks haven’t quite pierced right through. To be sure, what I did was pour petrol in and see if it came out the other side. Petrol is a low-density liquid (680 kg/m³), ideal for checking for small cracks in materials as it will ‘seep through’ before water (density 1000 kg/m³), for example. The things you learn with a front differential!
Once it was dismantled, I was able to focus on the crown gear assembly. This is where the botched welding job is concentrated, and now’s the time to see if I can fix it or if I’ll need more than just a crown gear and pinion.
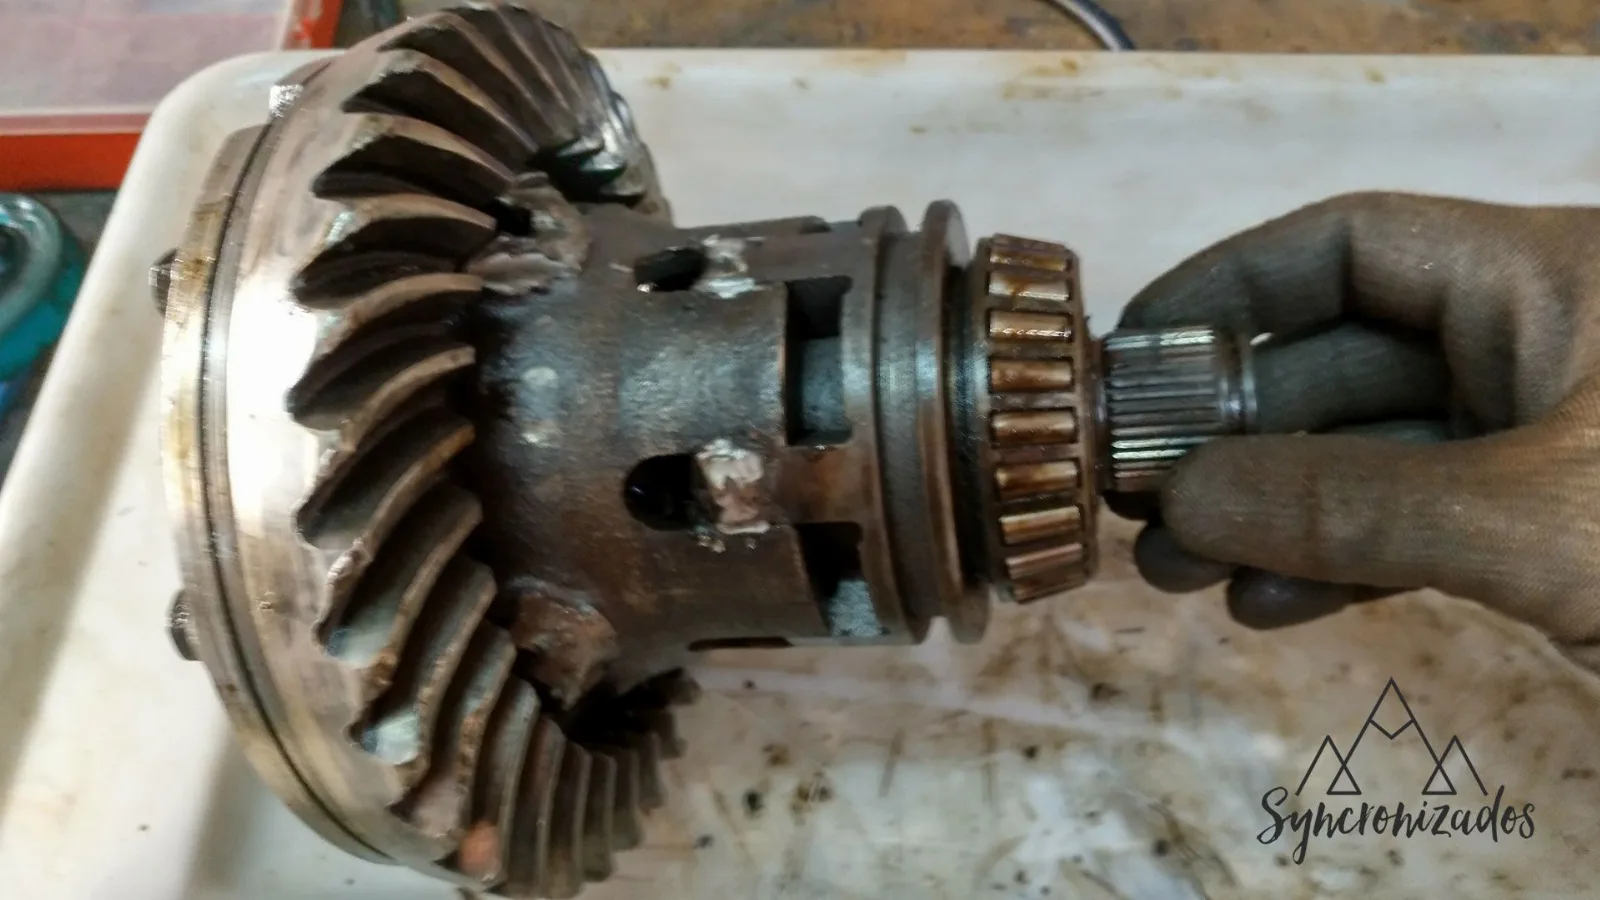
I decided to use grinding discs to gradually grind away the weld material. The good news is that it hasn’t fused with the differential’s metal, which makes it easier. Little by little, the weld is coming away and, with patience, I managed to separate the two parts.
If you’d like to know how this story continues, stay tuned for the front differential repair.