
The T3 Syncro’s viscous clutch
16 de noviembre de 2016
As the viscous coupling for my T3 Syncro came in a cardboard box, I was able – and keen – to check its condition so that, once restored, I could fit it.
What is the viscous coupling for?
The viscous coupling (VC) is a component of the drivetrain housed within the front differential, whose function is to transmit torque to the front wheels when necessary. The system operates via friction between discs coated in silicone (technical name: dimethicone or polydimethylsiloxane). It is also known as a Ferguson-type differential.
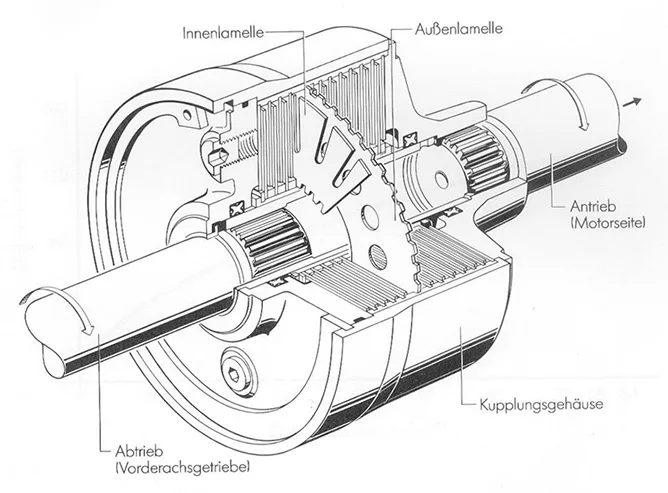
As shown in the diagram, the viscous coupling comprises a series of discs, some with tabs and others with perforations. Some are attached to the housing and others to the centre pinion in an alternating pattern. Drive shafts enter at both ends of the viscous coupling: one from the engine crankshaft and the other from the front drive shaft.
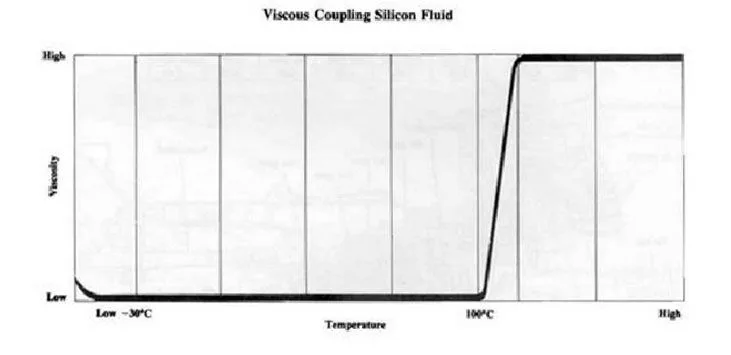
When the two sets of plates rotate at the same speed, the fluid remains at a low temperature and stays in a liquid state. When the shafts – and therefore the plates – begin to rotate at different speeds because the wheels on one of the axles are slipping on a surface, the shearing effect caused by the vanes and perforations in the fluid will cause it to heat up and its viscosity to increase dramatically (from 110 degrees). In this state, the fluid causes the plates to act as a solid unit, creating a rigid shaft effect that allows the force to be transmitted to the front axle and, consequently, to the front wheels.
Dismantling the viscous coupler
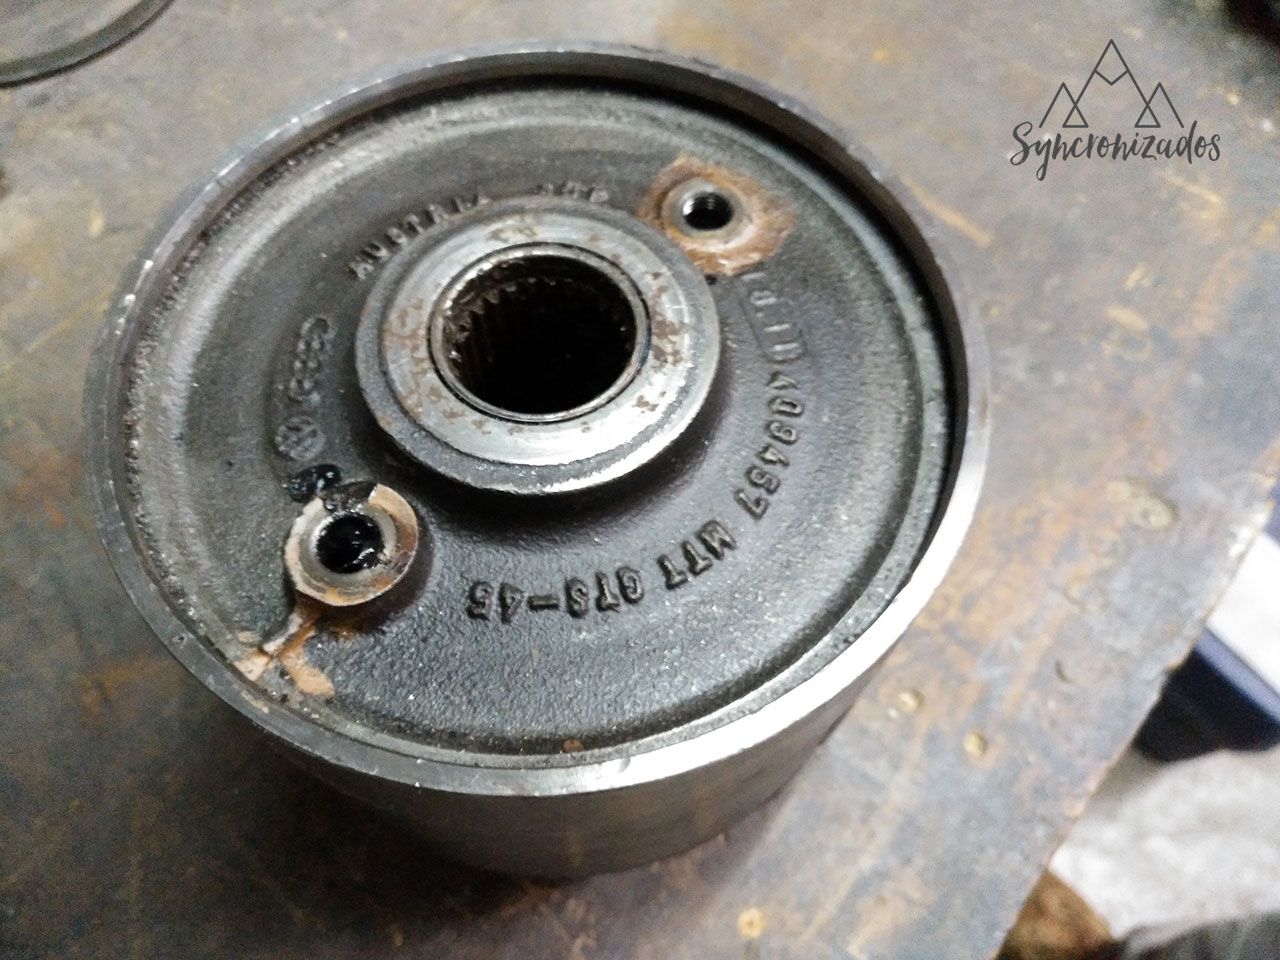
The first thing to try was turning it by hand, but we’d already seen that this was impossible. It was time to open it up to clean it thoroughly, change the seals and replace the silicone inside. The process begins by removing the two Allen-key plugs on the cover. In my case, the silicone didn’t come out, but I’ve seen photos of people who’ve opened these plugs and had the fluid spill out.
Once the plugs and their washers have been removed, it’s time to remove the Seger washer that secures the cover.
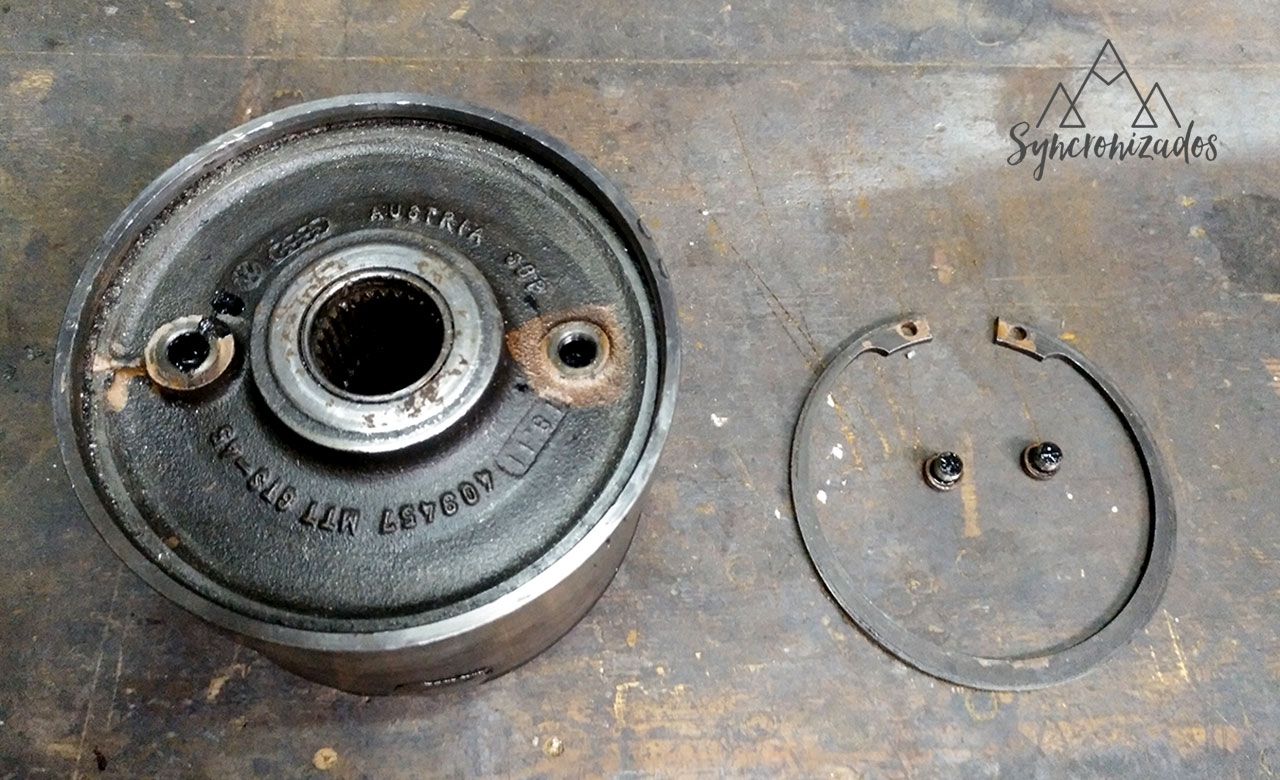
To do this, I had to buy a pair of pliers. I bought these on Amazon:
We can now access the interior by prying it open, as the lid’s seal will prevent it from coming off smoothly.
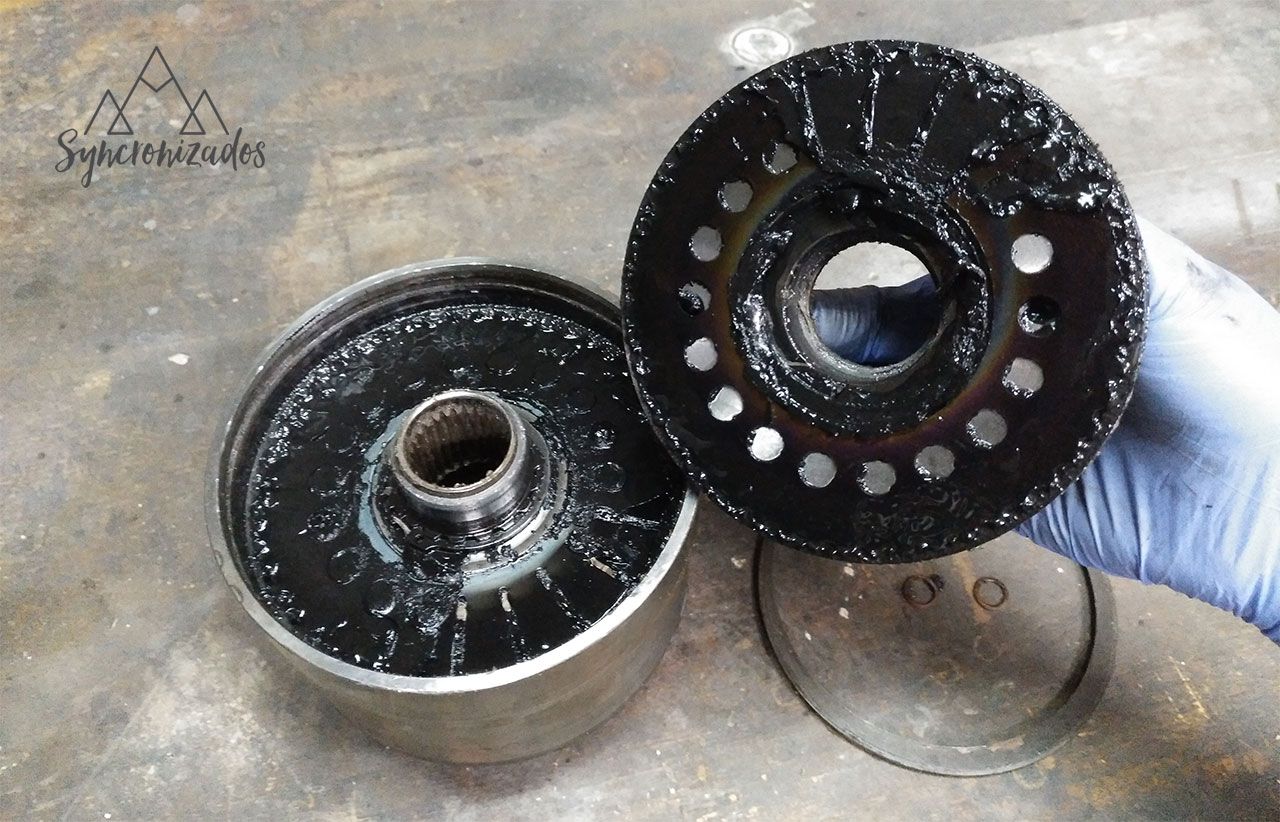
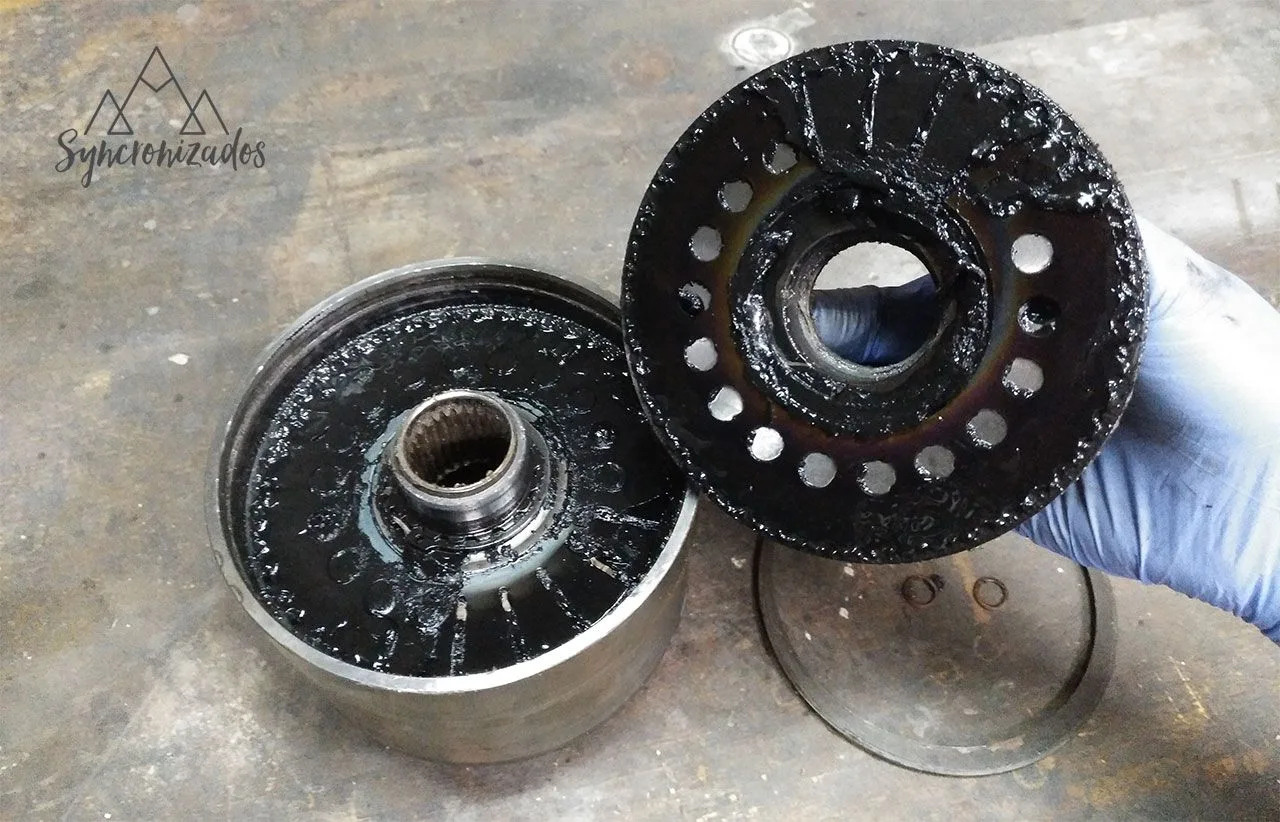
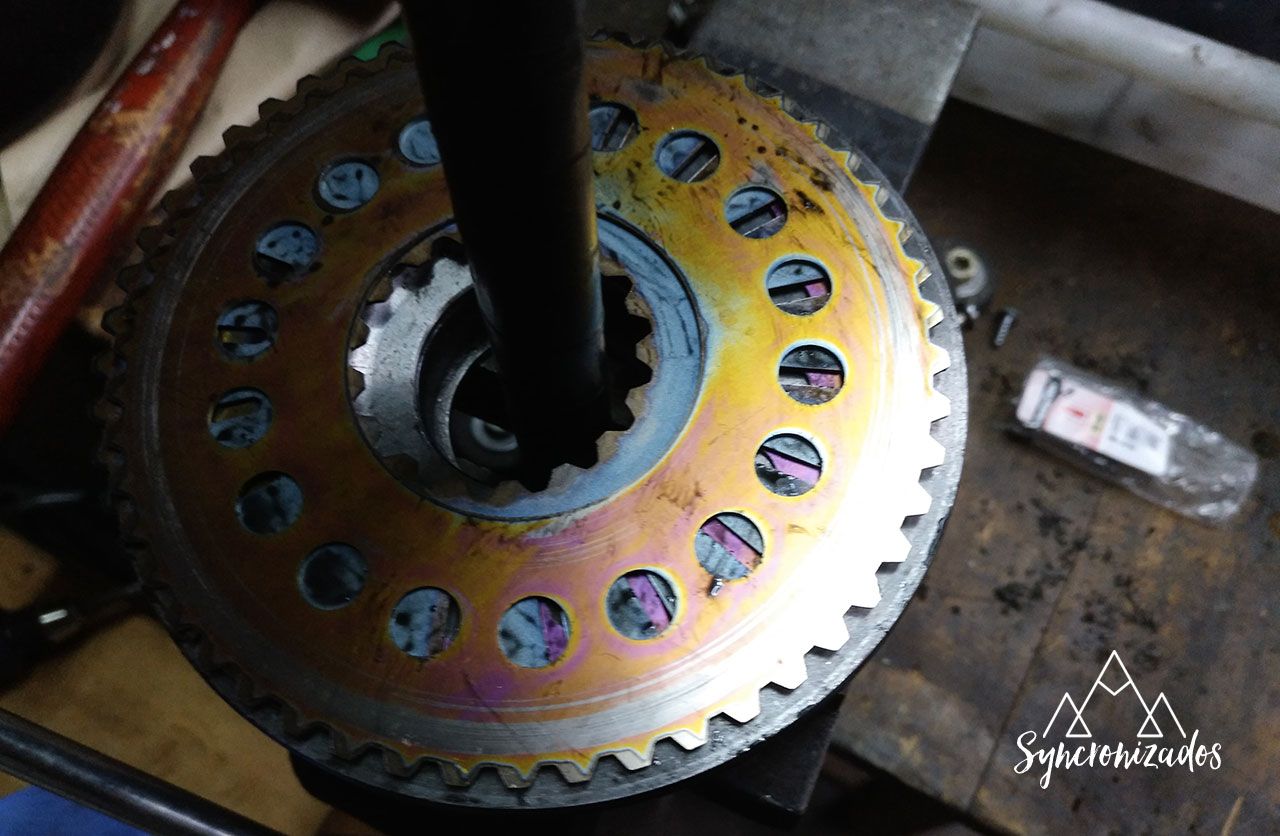
As you can see, the silicone is badly burnt. The discs won’t move and it’s difficult to remove them. The best way to clean them and remove all the silicone is with solvent and a brush.
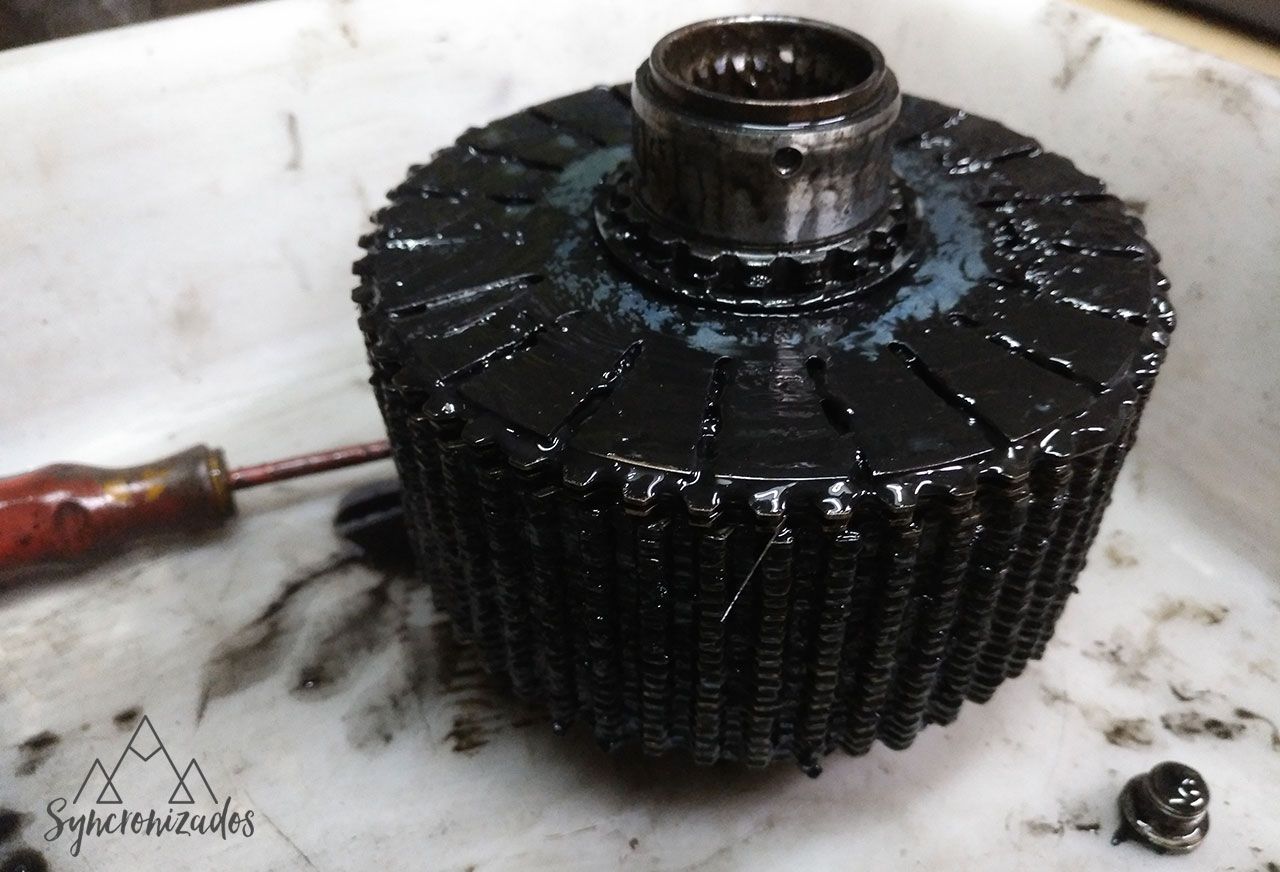
The whole set of discs and the centre sprocket come out. You just need to give it a few taps if it’s really stuck.
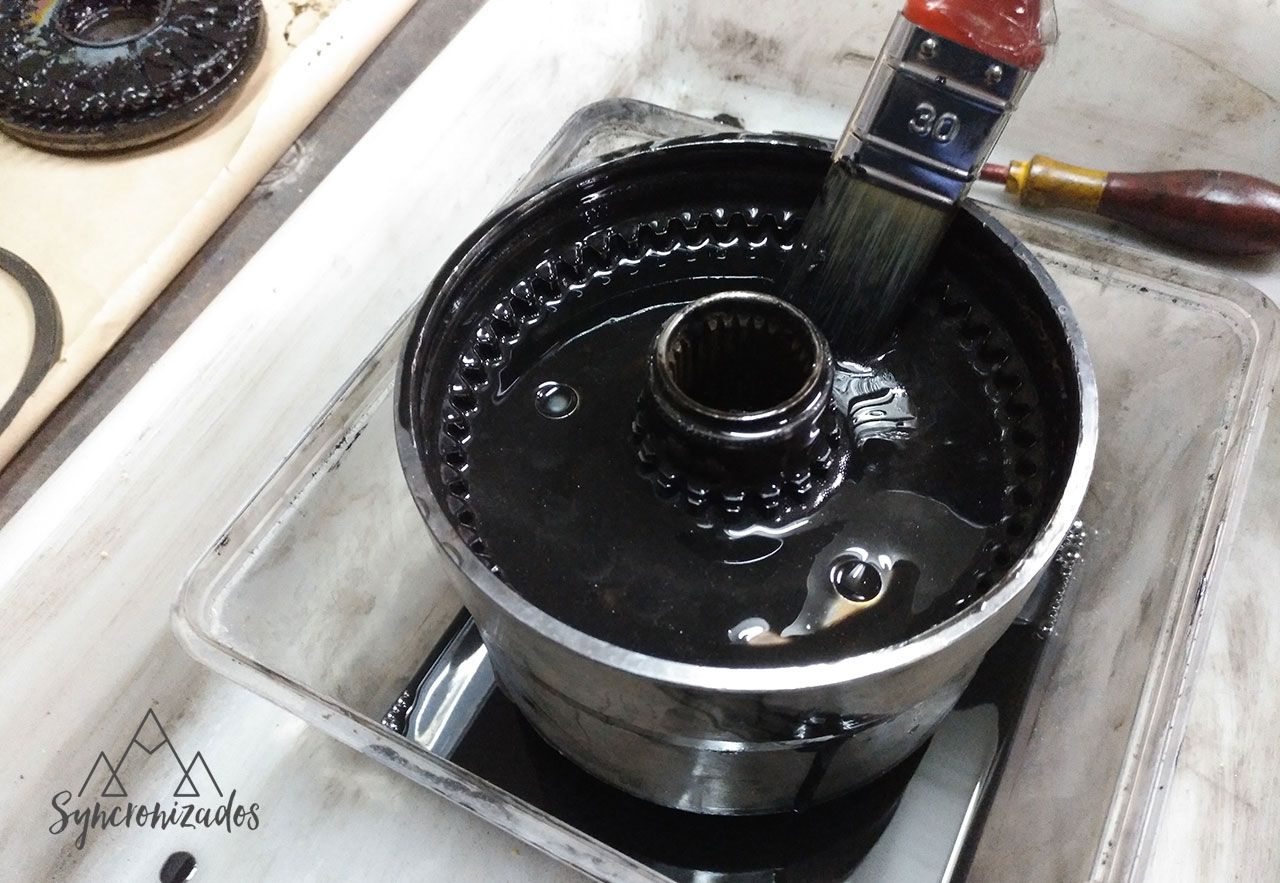
Now we can clean them much more thoroughly to remove every last trace of silicone. It’s a time-consuming job, as the silicone is so viscous that it sticks firmly.
Buying silicone and seals
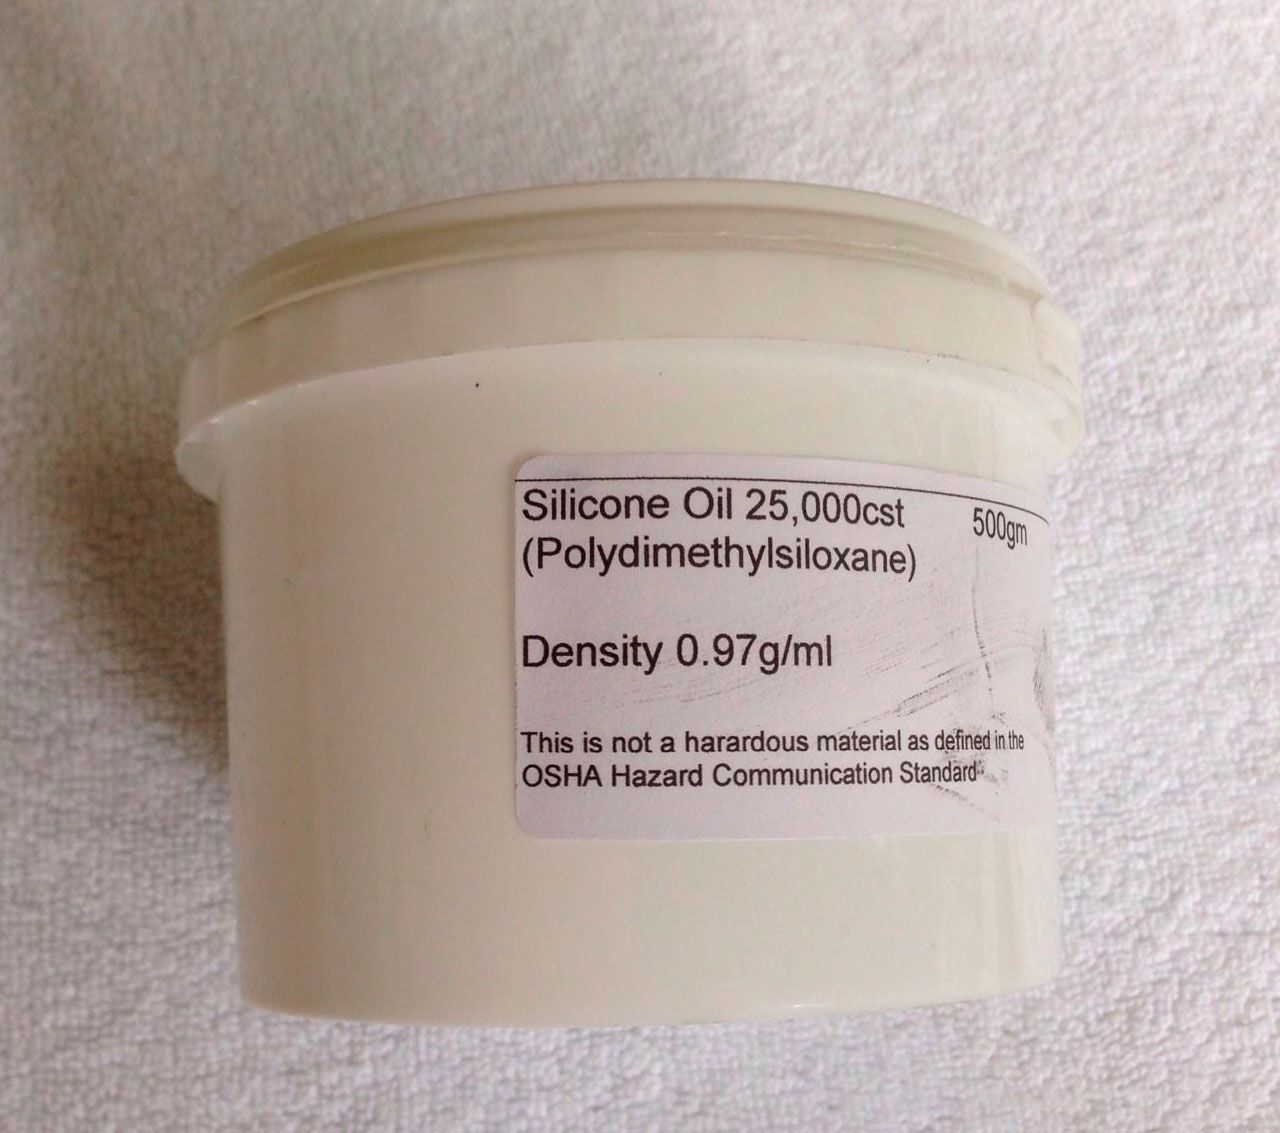
Firstly, we need the silicone. You’ll find this silicone online listed as ‘silicone oil’. It’s used in radio-controlled cars and comes in many different viscosities. In any case, I bought mine on eBay.
What viscosity should I use? Well, this is a controversial topic where the information isn’t very clear. What I’ve read on forums is that most people have used 100,000 cst silicone oil. However, others favour 25,000 cst if you’re not planning to drive on rough terrain, and 30,000 cst if you’re going off-road.
I’ve bought 30,000 cst silicone oil as, from what I’ve read, it seems to be the ideal choice for the latest T3 Syncro models to come out, whilst 25,000 cst is for the early production models. Finally, the 100,000 cst grade is recommended for the T4 Syncro models.
Having sorted out the silicone, I’ve also bought a set of gaskets and seals.

The dimensions of the seals, in case you can’t find them, are:
- 1x O-ring 126×2.2 or 124×2.5 FKM
- 2x O-ring (X) 40.64×5.33 or XR 40.65×5.33 FKM
- 1x copper ring for the plug screw
Assembling the viscous coupling
With everything clean and the silicone and seals to hand, it’s time to repair the viscous coupling. We’ll need a set of scales to measure the amount of silicone we’re applying and some circlip pliers to secure it.
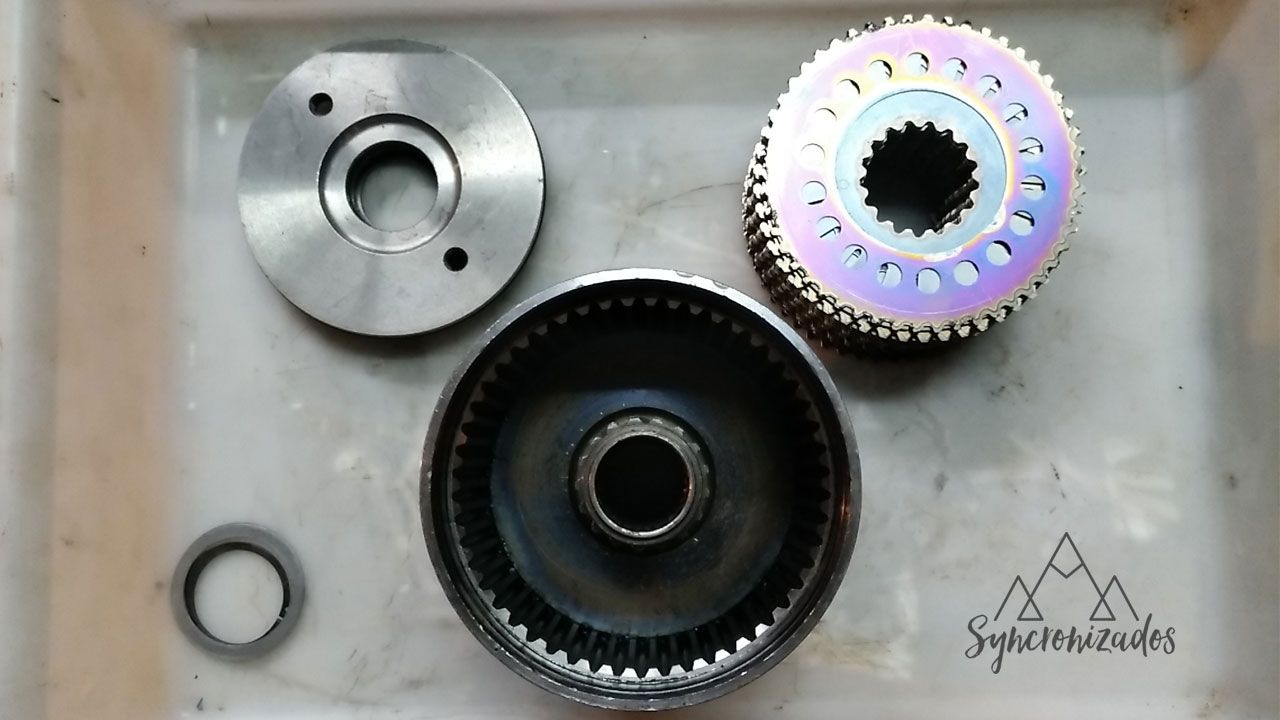
The process is very simple: first, we replace the retaining rings, insert the centre piece with the lower circlip in place, and start applying a generous amount of silicone to the base. Now we fit the discs one by one. Each time we fit one, we press down to force any air up to the surface. When we see that the discs aren’t covered in silicone, we add more and use the scales to measure the amount added.
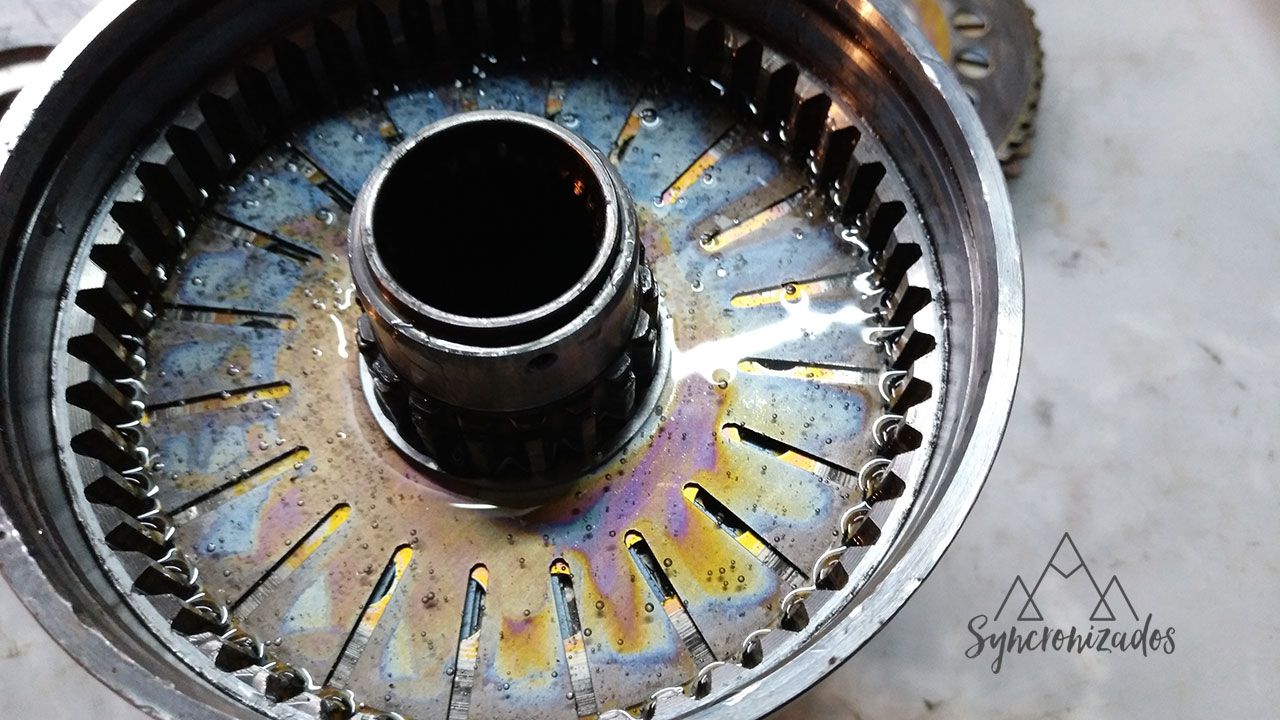
How much should I use? The recommended amount to put into the viscous unit is 290 grams of silicone.
Once all the discs are in place and the viscous unit is filled with silicone, apply pressure (ideally using a press), fit the locking washers and the circlip, and you can then fit the cover (having replaced its seal). The pressure should cause a little silicone to ooze out of the two holes. Now is the time to fit the large circlip and screw on the plugs.
With this, the viscous coupler is ready to be fitted into the front differential.
Alternative method
There’s a viscous coupler assembly process doing the rounds, taken from an Austrian forum. The article states that:
- Clean all the discs thoroughly
- Pour in the 290g of silicone
- Fit new gaskets and leave the plug screw hole open
- Heat the viscous fluid in the oven (for about 3 hours) until the centre reaches 130 degrees.
- Remove it and screw in the plug screw. If any oil comes out, wipe it off.
- Remove the screw again and leave to cool.
- Once cool, replace the screw.
Testing that it is working
To test whether it is working, it is recommended that you place the rear wheels on a test bench. If you then engage G-range, the front wheels should move the van off the test bench after the revs have risen slightly above normal. If this does not happen, then there is a problem. Volkswagen states that only when the engine is in G gear will the viscous coupler be able to transfer all the torque to the front wheels.
Sources:
Austrian website specialising in the viscous
coupling Thread on furgovw
Spare parts on eBay
Interesting articles on the viscous
coupling Information regarding the viscous coupling
A series of videos showing the entire process of restoring the viscous coupling:
And a video showing how to remove it: